
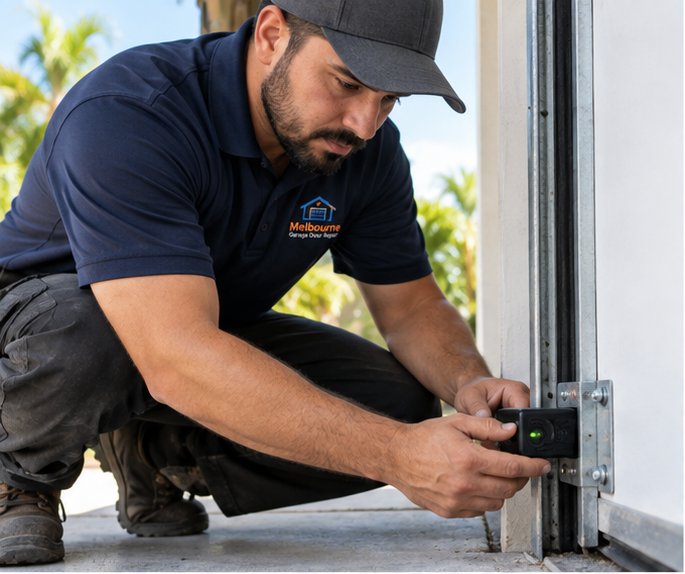
What the two sensors do
Every modern opener is paired with a set of photoelectric sensors. One is a sender, which projects an invisible beam of infrared light. The other is a receiver, which looks for that beam. They are mounted a few inches above the floor, facing each other across the opening.
While the door is closing, the opener keeps checking that the beam arrives. If something passes through it, the opener stops the door and sends it back up. It is a simple idea, and it has prevented countless injuries and damaged vehicles. That is why we treat a sensor problem as a safety matter first and an inconvenience second.
The sensors work alongside a second protection built into the opener, which senses resistance when a closing door touches something solid. The two systems cover different situations. The beam acts before contact, while the force-based reverse acts on contact. A sound installation has both working, and a good repair visit confirms both.
It also helps to know that the sensors only matter on the way down. When the door is rising, the beam is not consulted in the same way, so a sensor fault usually shows up only when you try to close the door. That is a useful clue when you are describing the problem to us.
Signs the sensors need attention
Sensor trouble often looks like something bigger. People assume the opener has died, when the real cause is a small misalignment at floor level. Here are the signs we see most often.
- The door starts to close, then reverses and goes back up before it reaches the floor.
- The opener lights flash when you press the button, and the door will not move down.
- The door only closes when you hold the wall button, and the opener behaves differently with a remote.
- One of the two sensors shows a dim, flickering or missing indicator light.
- The problem comes and goes through the day, often worse in the morning or evening.
- The door closes normally on some days and not on others, with no clear pattern.
How alignment works
Each sensor has a small light on its body. In most designs, a steady light on both units means the beam is aligned and the circuit is complete. A dim, flickering or missing light on either one tells you something is wrong with power, wiring or aim.
The sensors are held on brackets that are fastened to the wall or floor track, and the brackets can be bumped by a bicycle, a lawn mower, a trash bin or a car mirror. A shift of only a fraction of an inch can break the beam at the distance across a garage door. Correcting the aim means moving the bracket until both lights are steady, tightening it, and testing the beam several times.
Aim and height
The two sensors need to be at about the same height and pointed directly at each other. If one has tilted or dropped, the light from the sender misses the lens on the receiver.
Brackets and fasteners
Loose screws, cracked plastic brackets and corroded metal ones all allow the sensor to wander. Replacing a worn bracket is often a more lasting fix than simply bending it back.
A simple check you can try
There are some safe checks you can do yourself before you call. They do not involve the springs, cables or the brackets at the sides of the door, and none of them requires tools beyond a soft cloth.
Stop if anything seems unclear, and never place your hand or head under a moving door.
- Look at both sensors and note the color and steadiness of each light.
- Wipe each lens gently with a clean, soft, dry cloth to remove dust, cobwebs or film.
- Check that nothing is sitting in the beam path, such as a hose, a bag, a bin or a stored item.
- Look for a loose or hanging wire running from either sensor and see whether it has been pinched or pulled.
- Carefully nudge a loose sensor back toward the other and watch whether the light becomes steady.
- If the lights remain dim or off, or the wires look damaged, stop and let a technician take over.
Dirt, spiders and insects
It surprises many homeowners how often the cause is as small as a spider. Sensor lenses sit in a warm, dim spot near the floor, and webs and insects gather there. A thin film of dust or a trace of humidity on the lens can weaken the beam enough to confuse the receiver.
Cleaning is simple and worth doing now and then. A soft, dry cloth is the right tool. Avoid cleaning sprays or abrasive materials, which can scratch the lens and make the problem worse. In Florida, where insects are active for most of the year, a short look at the sensors during your regular garage checks is a good habit.
Sunlight interference
Strong sunlight shining directly into a receiver can overwhelm it. This is most common when the garage faces east or west and the sun sits low in the sky, at sunrise or at sunset. The door closes perfectly at noon and fails in the evening.
There are practical remedies. A small shield or hood fitted over the receiver lens can block the glare, and moving the receiver to the shaded side of the opening sometimes helps. In some cases the sensors are simply out of date and a newer model handles bright light better. We assess the situation on site, since the right answer depends on the direction of the garage and the sensor design.
Wiring faults
The sensors are connected to the opener by thin low-voltage wires. Those wires are stapled along the wall, run across the ceiling and end at the opener. Staples can pinch them, a stored ladder can snag them, and moisture and corrosion can eat at the connectors.
A broken wire often causes the symptom of a sensor with a dark or flickering light. We trace the wire, test it, and repair or replace the damaged section. Where a wire has deteriorated in several places, replacing the entire run is usually a more reliable choice than patching it repeatedly. If the wire leads back to a problem at the opener itself, it may be tied to the broader faults described on our opener repair page.
What the blinking lights mean
Many openers use their own lights to report sensor trouble. The lamp on the motor head or a small LED may blink a certain number of times when the circuit is incomplete. The pattern differs between makes, so a blink count is a clue, not a diagnosis.
In general, a blinking light after a close command means the opener thinks the safety circuit is open. That can be a misaligned eye, a cut wire or a failed unit. A steady light on both sensors with continued blinking points more toward the opener or the wiring behind the wall. Our page on blinking sensor lights walks through the patterns we see.
Sensor type and replacement
Sensors do wear out. The lens clouds, the circuit weakens, and long exposure to heat and moisture takes a toll. In older garages they may also be a model that does not suit the opener now in use. When a sensor pair cannot be brought back to steady operation, replacement is a straightforward repair.
We match the replacement pair to your opener rather than mixing unrelated parts, since the signal and the voltage must be compatible. After installation, we align the new set and test the beam and the reverse response. If your opener is old enough that its safety features are limited, we may also discuss the broader question of replacing the opener.
| What you see | Likely cause |
|---|---|
| Both lights steady, door still will not close | Problem may be elsewhere, such as the opener board or wiring |
| One light dim or flickering | Misaligned unit, dirty lens, or weak wiring |
| One light off completely | No power to that unit, a broken wire, or a failed sensor |
| Door closes only while the button is held | Sensor circuit open, and the opener is using a fallback mode |
| Fails only at certain times of day | Sunlight interference on the receiver lens |
| Door reverses with no obstruction | Beam interruption or a binding track nearby |
Why you should never bypass the sensors
It can be tempting to disable the sensors when they act up, especially if someone suggests holding the button down or taping over a light. We do not recommend any workaround that defeats the protection. The beam exists because garage doors are heavy and can cause serious injury.
A door that closes without the sensor protection depends entirely on the force-based reverse, which is not designed to be the only safeguard. If the sensors are giving you trouble, the right path is to repair or replace them. The guide on garage door safety tests describes how the whole system should behave.
Safety for children and pets
Households with young children and pets have the most to gain from healthy sensors. Children are drawn to the moving door, and small pets can walk under it without any noise. A working beam is the first line of protection.
Sensors should sit low enough to catch a small animal or a child crawling. Teach children never to run under a closing door and never to play with the wall control. Keep remotes out of reach and consider a wall control mounted at an adult height. Our guide on garage door safety for kids and pets has more ideas.
What a sensor visit covers
When we arrive for a sensor problem, we start by looking at the symptoms and the surroundings. We check both lights, inspect the brackets, examine the wiring and clean the lenses. We note the direction the garage faces and whether sun may be involved.
Then we realign or replace as needed, tighten the brackets and test. The test includes breaking the beam while the door is closing, confirming that the door stops and reverses, and then running full cycles to check consistency. We also confirm that the force-based reverse works. If we find a different problem, such as a binding track, we explain it before doing anything further.
Sensors after a storm or a collision
Storms can leave water in a garage, and sensors sit at the lowest part of the opening. Wet connectors, corroded terminals and bent brackets are common after flooding or driving rain. A vehicle bumping the sensor or the track can move it out of alignment even when no damage is visible.
If the door was struck, or if debris and water entered the garage, have the sensors and the door checked together. Our pages on storm damage and on hurricane season service describe the broader picture.
Older garages and newer rules
Safety sensors became standard on residential openers in the United States many years ago, and openers made before that period may rely only on the force-based reverse. If your garage has an older opener with no sensors at all, or with a pair that has been disconnected, the door is less protected than it should be.
In that situation, adding or restoring sensors may be possible, or the better course may be a new opener that includes them. We look at the age and condition of the unit, explain what protection it currently offers, and describe the choices. We do not insist on one route, but we do want you to know where the gaps are.
When the sensors are fine but the door still misbehaves
Sometimes we arrive, find two steady lights and a clear beam, and the door still reverses or refuses to close. That does not mean the visit was wasted. It narrows the search to other causes that look the same from the driveway.
A track that binds near the bottom can trip the force-based reverse. A door that is out of balance can reach the floor with too much resistance. Travel limits that are set slightly wrong can make the opener think it has met an obstruction before it has touched the ground. A failing logic board can also give a false reading. We check each of these in turn, and we explain which one we found. If the door is hard to move by hand, we treat it as a spring or balance problem and leave those parts alone until the right repair is arranged.
Keeping the sensors working
A few habits keep sensors reliable. Wipe the lenses a couple of times a year. Keep the area at the base of the door tidy so nothing brushes the sensors. Check from time to time that both lights are steady. Do not move the brackets without a reason, and never let children play with them.
Also test the reverse response occasionally. Place a roll of paper towels or a similar light object on the floor in the path of the door, close the door with the wall control, and confirm that it stops and reverses on contact. If it does not, stop using the opener and have it checked.
Questions and answers
The opener believes something is in the way. Most often the sensors are misaligned or dirty, or a wire has been pinched. Clean both lenses, clear anything from the beam path and check that both lights are steady. If it persists, a technician can test the sensors and the force settings properly.
A steady light on each sensor generally means power and alignment are good. A dim, flickering or missing light points to aim, wiring or a failed unit. The exact meaning varies by make, so we treat the lights as clues and confirm with testing before choosing a repair.
Yes. Strong light shining straight into the receiver can swamp the beam, especially on garages that face east or west. A small shield over the receiver can help. We check the direction of the garage and the sensor model before recommending a fix.
We advise against it. The sensors are a main safety feature, and the door should not be used without them working. Holding the button down to force the door shut is a workaround that removes protection, so please wait for a proper repair.
A confident homeowner can wipe lenses and gently adjust a loose sensor. Replacement involves wiring and testing the safety reverse, and the new pair has to match the opener. We suggest leaving replacement to a technician and always testing the beam afterwards.
A glance at both lights during your regular garage checks is enough for most households, with a lens wipe a couple of times a year. Test the reverse every month or so with a light object on the floor. Check sooner after storms, a bump from a vehicle or any change in behavior.
No. Sensors vary in signal type, wiring and connector style between makes and generations. Mixing unrelated parts can cause problems. We match the replacement pair to your opener and test the system afterward, so that the beam and reverse function together.