
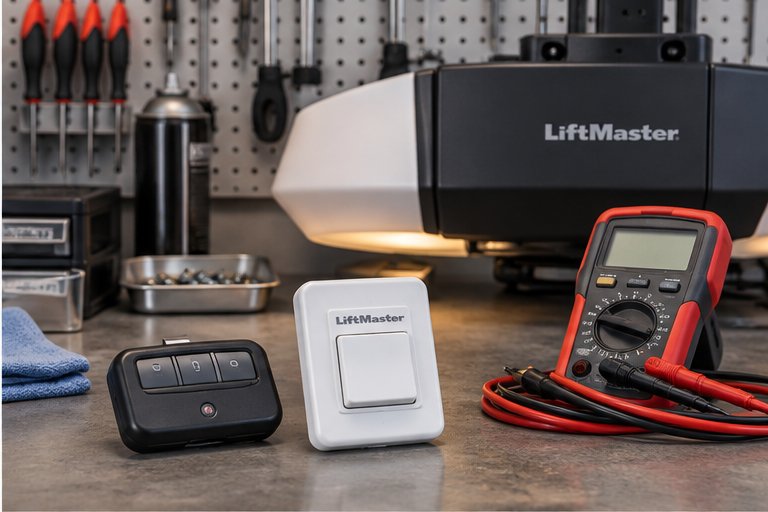
What the wall control actually does
The wall control looks like a simple button, but it is a small electronic device that talks to the opener over thin low voltage wire. When you press it, the control sends a signal down that wire, and the opener's circuit board decides whether to open, close or stop the door. Many modern controls also carry extra buttons for the light, a lock function and a status display.
Because the signal is so small, the system is sensitive to anything that interrupts it: a loose wire end, a nick in the insulation, moisture creeping into a connection, or a worn contact inside the button. That is why a wall control can fail in odd ways, such as working only when you press it firmly or only when the door is in a certain position.
Understanding this helps you describe the problem to us. A control that is completely dead points toward wiring or the control itself. A control that works sometimes points toward a connection that is loose, corroded or pinched.
Signs the wall control needs attention
Most people first notice a wall control problem as a small annoyance and live with it for a while. Pressing the button twice, leaning on it, or walking out to the car and using the remote instead are all quiet signs that the control is wearing out or that something in the wiring is changing.
Here are the symptoms that bring most of our visits for this service.
- The button does nothing, but the remote still operates the door.
- The door responds only if you hold the button down for a long moment.
- The control display is blank, dim or showing odd characters.
- The door moves on its own after you press the button once and walk away.
- The light button works but the door button does not, or the other way around.
- The control clicks or beeps but the opener does not react.
- The control works in the morning and fails in the afternoon, or only after rain.
A useful clue: does the remote still work?
If the remote runs the door normally, the opener motor, the circuit board and the door itself are probably fine, and the problem is narrowed to the wall control or its wire. If neither the remote nor the wall control works, the cause is more likely in the opener, the power supply or the door, and the wall control is only one suspect among several.
Tell us which of those situations you are in when you reach out. It saves time at the door and helps us come prepared.
Lock mode and why the remote suddenly stops
Many wall controls include a lock or vacation function. When it is switched on, the opener ignores signals from handheld remotes and keypads, while the wall control itself keeps working. It is a useful feature when the family is away, but it is also one of the most common reasons a household believes its remotes have died.
Lock mode is usually activated by pressing and holding the lock button for a couple of seconds, and the control shows a blinking light or a message when it is engaged. Children, guests and pets that lean on the panel can switch it on without anyone noticing.
If you suspect lock mode, look at the control for a flashing indicator and press and hold the lock button for a few seconds to see whether it clears. If the remotes return to life, you have your answer. If the lock indicator will not go away, or the button seems to do nothing, the control or its circuit may be faulty and worth a visit.
Simple checks you can do safely
Before you call, there are a few harmless checks that tell us a great deal. None of them involve the door springs, cables or brackets, and none require tools beyond a household stepladder you can use safely.
Please stop at any point where you feel unsure, where the door is moving in a way you cannot control, or where something looks damaged.
- Press the wall control and watch the opener. Note whether any lights, sounds or movement happen.
- Look at the wall control for a lit indicator, a display message or a blinking light.
- Check for lock mode as described above.
- Test the remote or keypad to see whether the opener responds to those.
- Look at the thin wire running from the control to the opener for obvious pinching, staples driven through it or chewing by pests.
- Check that the opener is plugged in and that the outlet has power, perhaps with a lamp you know works.
- Check the breaker panel for a tripped breaker serving the garage.
What not to do
Do not pull the control off the wall and cut or splice wires to see what happens. A wire stripped to the wrong terminal can damage the opener's board, which turns a small repair into a larger one. Do not touch the springs, cables or the brackets at the bottom of the door under any circumstances. If anyone is hurt, call 911.
How we diagnose a wall control fault
We begin by watching the system do what it is doing wrong. A technician presses the control, listens to the opener, and compares the behavior with the remote and keypad. This tells us right away whether the opener board is receiving the wall signal.
Next we check the control itself. We look at the terminals behind it, confirm that the wire ends are clean and firmly seated, and test the signal at the opener end of the wire. A wire that tests fine at one end and fails at the other tells us the break is somewhere in the run.
Finally we test the opener's terminal connection and, if needed, try a known good control on a temporary basis to see whether the symptoms follow the control or stay with the opener. That three part approach lets us separate a worn button from a damaged wire from a failing board, which are very different repairs with very different outcomes.
Throughout, we explain what we are doing in plain English. You will know what we found and why before we recommend anything.
Wiring faults behind the wall
The wire between the control and the opener is thin and easy to damage. It runs along ceiling joists, down a wall and sometimes through an attic or a drywall cavity. Over years it can be pinched by a staple, stretched when a shelf is installed, nibbled by rodents or insects, or corroded where it meets a terminal in a humid garage.
Space Coast humidity matters here. Salt in the air and the damp warmth of a closed garage encourage green and white corrosion on bare copper, and that corrosion adds resistance until the signal weakens or disappears. Garages near the water and homes with a tight, unventilated garage space tend to see this more often.
When we find a damaged run, the usual repair is to replace the damaged section or the whole wire with new low voltage cable, secured neatly so it cannot be pinched again. When the damage is inside a wall and not reachable, we talk through the options with you, including routing a new wire along an accessible path.
Replacing a worn or outdated wall control
Wall controls are made to last a long time, but the buttons wear, the plastic yellows and cracks, and the internal contacts lose their spring. Some older controls also lack features that newer openers rely on, such as separate light and lock buttons or a connection for modern safety functions.
A replacement control must be compatible with the opener it serves. Not every control works with every opener, and the wiring terminals differ. We confirm what your opener expects before fitting anything, rather than guessing from the look of the old panel.
We will also point out features worth having. A control with a clearly visible lock button, a light button and an indicator is easier for everyone in the household to use correctly. If your opener supports a motion detecting or backlit panel, we can explain how that works and whether it suits your garage.
Position and height of the control
A wall control should be mounted where you can see the door while operating it, and high enough that small children cannot reach it. If your current control is in a poor spot, a replacement is a good moment to move it. We can discuss the options when we are there.
Opener lights: how they work
The light on a garage door opener is wired to the opener's circuit board and switches on when the door moves, then stays lit for a set period before turning off. Most openers let you control the light separately from the wall control or a remote button, and many have a feature that holds the light on after the door stops.
Behind the lens you will usually find one or two sockets that accept standard bulbs, though the type, wattage and base can differ between models. Newer openers often have built in LED lighting that is not meant to be replaced as a bulb.
Understanding this arrangement explains most light complaints. A light that never turns on may be a dead bulb, a failed socket or a board fault. A light that stays on forever may be a stuck switch, a control setting or a board relay. A light that flickers may be a loose bulb, a worn socket or a bulb that does not suit the vibration of the opener.
Bulbs that keep burning out
Few garage door complaints are as irritating as a bulb that dies after a few weeks. The cause is often one of two things: vibration and the wrong kind of bulb.
An opener shakes slightly every time it runs, and an ordinary household bulb with a delicate filament does not enjoy that. Bulbs made for rough service are built to tolerate vibration and tend to last longer. Another common cause is a bulb with a wattage higher than the opener is designed for, which makes the socket and the lens hot and shortens bulb life.
Some LED bulbs also cause trouble in a different way. Certain LED designs can emit electrical noise that interferes with the radio signal used by remotes and keypads, shortening the range or making the door ignore commands. If your remote range dropped after a bulb swap, that bulb is a prime suspect.
We can check the socket for scorching or looseness, confirm the right bulb type for your opener, and explain the choices so you stop replacing the same bulb again and again.
Sockets, lenses and the light circuit
When a new bulb does not fix a dead light, the next suspect is the socket. Sockets can corrode, lose their spring tension or crack after repeated heat cycles. A socket that does not make good contact leads to a flicker or a dead light even with a new bulb.
The lens or cover on many openers is a snap on piece that can warp or crack with age. A damaged lens lets in dust, insects and moisture. It may also let a bulb rattle loose. We can replace or secure a damaged lens when parts are available for your model.
If the sockets are sound and the bulb is correct but the light still fails, the problem may be the board's light circuit or the wiring to the sockets. These are less common but real. In those cases we explain the options, which may include repairing the circuit or recommending a replacement board or opener when the cost and age make that wiser.
Changing a bulb yourself, with care
Replacing an opener bulb is an ordinary household task if you follow a few rules. Unplug the opener first, use a stable stepladder on level ground, let a hot bulb cool, and keep your hands away from any moving part of the door or the opener carriage. If the cover requires tools or you are not comfortable on a ladder, leave it to us.
Lights, controls and the safety sensors
The wall control, the opener light and the safety sensors share one thing: they all depend on a healthy low voltage circuit. That means a fault in one may show up in another. A pinched wire, a failing power supply or a weak board can produce several symptoms at once.
For example, a light that flickers when the door moves may be telling us about a loose connection that also affects the sensors. A wall control that works only intermittently may be sharing a bundle with a sensor wire that is also damaged. When we find a problem in one area, we check the others as a matter of habit.
This broader look is part of what a visit adds beyond swapping a part. If your sensor lights blink or the door reverses before closing, our pages on safety sensor repair and blinking sensor lights explain what that behavior means.
Power, surge damage and the Florida storm season
The Space Coast has frequent summer thunderstorms and the occasional tropical system, and electrical surges are a real cause of control and light failures. A nearby strike or a power fluctuation can damage the opener's board without any visible mark. The wall control may go blank, the light may stop working, or the opener may behave erratically after a storm.
If you suspect a storm related fault, leave the opener unplugged until we can look at it, and use the manual release carefully to operate the door if you need to. Our guide on using the manual release during a power outage explains the safe way to do that.
We check the outlet, the power supply and the board for signs of surge damage. In some cases the fix is limited to a control or a fuse. In others, the board or the opener has been affected and we discuss repair or replacement honestly, including when it makes sense to look at opener repair or a full replacement.
What a visit looks like
When you contact us, tell us what the control and the light are doing, what kind of opener you have if you know it, and whether the remote still works. Photos of the opener label and the wall control are helpful but not required.
A technician arrives, looks at the door and the opener, and tests the control, the wire and the light circuit. We explain what we find, show you where the fault is, and set out the options. You decide how to proceed. Nothing is repaired until you understand what and why.
If the repair is straightforward, such as a control replacement or a bulb and socket fix, we can often complete it during the same visit when parts are suitable for your model. If a part must be matched to an older opener, we tell you that plainly. Our page on what happens during a service visit describes the whole process in more detail.
When repair is not the right answer
Not every fault deserves a repair. If the opener is old, the board is failing in several ways, replacement parts are no longer made, or the cost of fixing the control and light would approach the cost of a new unit, we say so. A newer opener may bring features that matter to you, such as a quieter drive, battery backup or smartphone control.
We would rather you make a clear decision than spend money on a repair that will not last. Our guides on choosing a garage door opener and smart opener basics can help you think about what you want before we talk.
If the opener is fine and only the control or light is faulty, we repair just that and leave the rest alone.
Getting started
If your wall control is unresponsive, your lock mode will not clear, or your opener light has stopped working, contact us and tell us what you are seeing. We will come to your Melbourne property or nearby Space Coast community, look at the control, wiring and light, and explain the options clearly.
If you are not sure whether your symptom belongs to the control or to the opener itself, our pages on a wall button that is not working and a flashing opener light help you describe what you are seeing in useful detail.
Questions and answers
When the remote operates the door, the opener motor and board are generally healthy, so the fault is narrowed to the wall control or the thin wire that connects it to the opener. The cause may be a worn button, a loose terminal, a nicked wire or corrosion. We test each part in turn so we replace only what has actually failed.
Lock mode is the most common reason. When it is on, the opener ignores handheld remotes and keypads but still accepts the wall control. Look for a blinking indicator on the control and press and hold the lock button for a few seconds. If the remotes do not return, the lock circuit or the control may be faulty.
No. Controls differ in the signals they send and in how they connect to the opener, and a mismatched control may not work or may cause odd behavior. We confirm what your specific opener expects before fitting a replacement, which avoids guesswork and returns.
The usual causes are vibration from the opener, a bulb with too high a wattage for the fixture, or a worn socket that does not hold the bulb firmly. Bulbs designed for rough service often last longer. We check the socket and recommend a suitable bulb type for your model.
Yes, some LED bulb designs create electrical noise that interferes with the radio signal the opener listens for, shortening remote range. If your range dropped after changing the bulb, try a different type of bulb and tell us if the problem continues so we can look at the opener.
It can be, if you unplug the opener, use a stable stepladder on level ground, let the bulb cool and keep clear of the moving parts. If the cover is stubborn, you feel unsteady or anything looks damaged, please leave it for a technician. Never touch the springs, cables or lower brackets of the door.
Storm surges can damage the control or the opener board. Unplug the opener until it can be checked, and use the manual release carefully if you need to move the door. We check the power, the wire and the board, then explain whether a control, a board or the opener itself needs attention.