
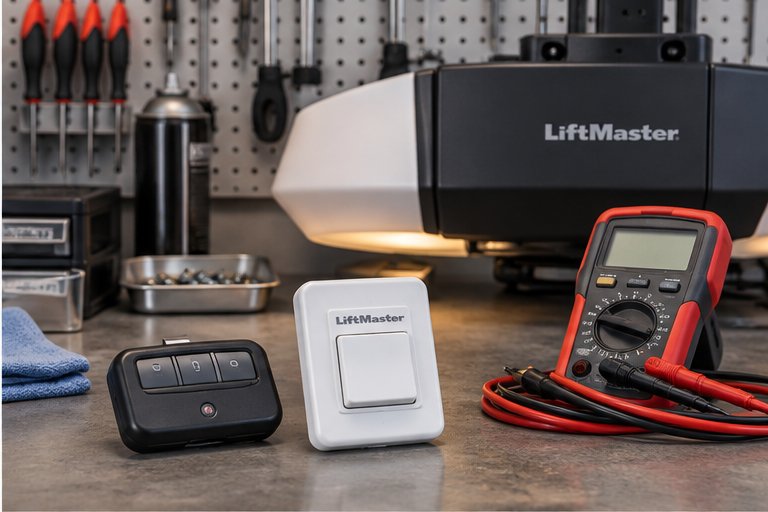
When replacing the opener is the right call
Some openers are worth repairing, and some are not. Replacement usually makes sense when the logic board has failed on an older unit, when the motor has worn out, when parts for your model are hard to find, or when repairs keep coming one after another.
It can also be the right call when you simply want something different: a quieter machine for a garage under a bedroom, a unit that fits a low ceiling, or controls that work with a phone. If you are not sure which side of the line you are on, our page on opener repair shows what a repair involves, so you can weigh the two.
Start with the door, not the opener
An opener is only as good as the door it moves. Before any new unit goes in, we check the balance of the door, the condition of the springs, the tracks and the rollers. A door that is heavy, sticky or poorly balanced will wear out a new opener sooner and may make it unsafe.
If the springs or cables are the real problem, we will tell you, and we will not hide that behind a new opener. Spring work is a separate repair done by trained technicians, because those parts hold dangerous tension. Our guide to how garage doors work explains why the opener is the guide and the springs are the muscle.
The four drive types in plain English
The drive is the part that connects the motor to the door. It determines how the opener sounds, how much it needs maintenance and where it can be installed. There are four main types, and each has real strengths.
Chain drive
A metal chain pulls a trolley along the rail. It is a long-established design that handles heavy doors well and is easy to service. It is also the noisiest of the four, with a rattle that you will notice if a bedroom shares a wall with the garage.
Belt drive
A reinforced belt replaces the chain. The motion is smoother and noticeably quieter, which is why belt units are common where the garage is attached to living space. They cost more to buy than a chain unit of similar capacity.
Screw drive
A threaded steel rod turns to move the trolley. There are fewer moving parts than a chain, and the opener completes its cycle in a lively way through its cycle. Screw drives can be sensitive to temperature swings and need occasional lubrication.
Jackshaft or wall-mount
The motor sits beside the door, on the wall, and turns the torsion shaft directly. There is no rail on the ceiling, so the space above the car is clear. This suits garages with a high-lift track, a loft above, or a storage rack where the rail would be in the way.
Side-by-side comparison
The table gives a feel for the differences. It is general, and the right choice for your garage depends on the door weight, the ceiling and how you use the space. If you want a deeper look, read our comparison of chain, belt and screw drive openers.
| Drive type | Sound level | Upkeep | Good fit |
|---|---|---|---|
| Chain | Louder, with a mechanical rattle | Occasional lubrication and chain tension check | Detached garages, workshops, heavy doors |
| Belt | Smooth and quiet | Little routine upkeep beyond inspection | Garages beside bedrooms or living areas |
| Screw | Moderate, with a steady hum | Periodic lubrication of the rod | Homes wanting few moving parts |
| Jackshaft | Quiet, motor is on the wall | Check shaft hardware with the door | High ceilings, lofts, clear overhead space |
Horsepower in plain terms
Horsepower ratings are one of the most confusing parts of shopping for an opener. Marketing numbers can exaggerate, and a bigger number does not automatically mean a better match. What matters is whether the opener can handle the weight of your door with room to spare.
A standard single door that is properly balanced does not need a huge motor, because the springs carry most of the load. Heavier doors, such as solid wood, insulated steel or oversized doubles, benefit from a stronger unit. If the door is hard to lift by hand, more horsepower is not the fix; the balance needs attention. We choose based on the door in front of us rather than the biggest label on the shelf.
Matching an opener to your door and ceiling
Beyond drive type and power, a few physical details decide what will fit. Headroom is the space between the top of the door and the ceiling or any obstruction. Rail length depends on door height. Garages with extra-tall doors need longer rails or special kits.
Ceilings that are finished, sloped or occupied by pipes, ducts and storage can change the plan. We measure before we recommend. Some garages are better served by a wall-mount unit for exactly this reason. Our guide to choosing a garage door opener covers these considerations if you prefer to read ahead.
Features worth knowing about
Modern openers offer more than the old push-button box. Some features are genuinely useful in Florida, and others are matters of taste. Here is a short list of what comes up most often in conversation.
- Soft start and soft stop, which reduce strain and noise at each end of travel.
- Built-in battery backup, which lets the opener work during a power outage for a limited number of cycles.
- Smart connectivity, which lets a phone show the door status and open or close it remotely.
- Rolling-code remotes and keypads, which change their signal each use for better security.
- Integrated lighting, usually LED, with timers that turn off after a set period.
- Vacation or lock modes that disable remotes while you are away.
Smart control and Wi-Fi
Many new openers include Wi-Fi or can accept an add-on module. The benefits are real: you can check whether the door is closed from anywhere, give a guest or contractor temporary access, and receive a notice if the door opens when it should not.
The tradeoffs are also real. A smart opener depends on your home network, an app and a manufacturer service, so setup takes care and the network needs to reach the garage. Our pages on smart opener and Wi-Fi setup and on smart opener basics describe what to expect.
What installation involves
Installing an opener is more than bolting a motor to the ceiling. The old unit comes down, along with its rail, brackets and wiring. The new rail is assembled and mounted to a header bracket that must be fastened into solid framing. The motor head is hung from the ceiling, the door arm or trolley is connected to the top section of the door, and the wiring is run to the wall control and sensors.
Once it is mounted, we set travel and force, program the remotes and keypad, and confirm everything operates smoothly. The door itself should move evenly in your hands before the opener is connected; if it does not, we address that first.
Removing the old unit
Removal is part of the work and it deserves care. The old rail and motor head are heavy and are often fastened to the ceiling with more hardware than you would expect. We disconnect the power first, release the trolley from the door, and lower each piece in turn.
While the old unit is down, we look at what it was attached to. Sometimes the header bracket has loosened, or the top door section has cracked where the arm connected. It is much easier to correct these things now than after the new opener is hung. We also look at whether the old wiring is still sound or whether it was damaged by moisture or insects.
We take the old equipment with us unless you want to keep a part, such as a working remote or a spare light fitting.
Mounting and framing
The header bracket and ceiling brackets carry real loads, so they need to be fastened into framing rather than only into drywall. Where the framing is not where the bracket needs to go, we add support.
Wiring and power
The opener needs a nearby outlet or an approved connection. Low-voltage wires run to the wall control and to the two safety sensors. We route them neatly and secure them so that nothing hangs into the door's path.
Safety sensors and the reverse test
Every installed opener must have working safety sensors and a working reverse response. The two sensors mount near the floor, one on each side of the door, and the beam between them must be clear for the door to close. If the beam is broken while the door is closing, the opener must stop and reverse.
The second protection is the force-based reverse. When the closing door touches an obstruction, the opener must sense the resistance and go back up. We test both at the end of every installation and show you how to check them periodically. Read our safety sensor page for more about the eyes and why alignment matters.
Preparing the garage for the visit
A little preparation makes installation smoother. Clear the area under and around the door, move vehicles out, and make sure we can reach the ceiling above the door track. Move shelves or stored items that sit beneath the planned rail path.
If you have a particular wish, such as a keypad outside the door, a second wall control, or a different light arrangement, tell us beforehand. It is easier to plan these at the start than to add them afterwards.
Florida conditions that affect the choice
The Space Coast is humid, salty near the water and prone to summer storms. Those conditions affect opener choice in small but meaningful ways. Metal parts close to the coast corrode sooner. Electronics need to stay dry. Power outages are common enough that many homeowners think hard about a battery backup.
Hurricane season also raises the matter of what the opener does when the power is out, and how to operate the door safely by hand. Our guides on using the manual release during a power outage and on hurricane preparation cover the practical side.
Commercial and heavy-duty needs
Businesses, workshops and large garages sometimes need more than a residential opener can offer. Higher-use doors, wide openings and tall doors are often served by heavier equipment with different mounting arrangements.
If the door is used many times a day, or if it serves a building where the public or employees pass, tell us. The choice of unit, the safety features and the maintenance schedule all change, and we will explain the options.
Questions to settle before you decide
Choosing an opener goes more smoothly when a few questions are answered first. None of them is difficult, but each one changes what we would recommend, and it is better to think about them before the installation day than during it.
Take a few minutes with the household and talk through how the garage really gets used. A garage that doubles as a laundry room, a gym or a workshop has different needs from one that only holds cars.
- Is there a bedroom, office or living space directly above or beside the garage, where motor noise would be noticed?
- Does anything hang from the ceiling above the door, such as storage racks, a loft platform, lights or a second garage door track?
- How often is the door used in a typical day, and by how many people?
- Do you want to give family members, guests or service people their own access codes?
- Would you like to see the door status from your phone, or do you prefer simple controls?
- Do you plan to replace the door itself in the next few years, which could change the weight the opener must move?
- Is the garage connected to the house by a door that makes the security of the opener more important to you?
Taking care of the new opener
A new opener lasts longer when it is looked after. Once or twice a year, check the door balance by lifting it by hand with the opener disconnected, test the reverse response, wipe the sensor lenses, and listen for new noises. Keep the rail clean and, where the drive calls for it, lubricate it as the maker directs.
Also keep the remotes out of hot cars and replace their batteries when the range drops. Our monthly checklist gives a simple routine. Never adjust springs, cables or the brackets that hold them; those need a trained technician.
Questions and answers
It depends on noise, the ceiling and the door weight. Belt units suit garages next to living space, chain units suit heavy doors and workshops, screw units have fewer moving parts, and jackshaft units clear the ceiling. We look at your garage and explain which fits, so you are not guessing from a label.
Not as a rule. The springs carry most of the weight, and the opener only guides the door. If the door is hard to lift by hand, the balance or springs need attention. Extra horsepower may help with heavy doors, but it should not be used to hide a problem with the door.
Sometimes, but often not. Remote signals vary by opener generation, and older remotes may not match a new receiver. We can tell you whether yours are compatible and program new ones if needed. Bringing the old remotes to the visit lets us check them rather than assume.
It can be, if you like seeing the door status from your phone, giving temporary access, or getting alerts. It depends on your home network and an app, so there is some setup. If you only want a reliable door, a standard opener works well and has fewer moving parts to configure.
Yes, always. We test the travel, force, sensor beam and force-based reverse before finishing. These tests protect people, pets and vehicles. We also show you how to repeat the checks yourself from time to time, since settings and alignment can shift over the years.
Then the opener should not be asked to lift it. A broken spring leaves the door extremely heavy, and forcing it can damage a new unit and cause injury. Leave the spring and cables alone and have the door inspected first. We repair the spring system, then fit or reconnect the opener.
Some homeowners do, but it involves ceiling work, wiring and careful setup of the reverse features. The door must also be balanced first. We think professional installation is the safer course, and it avoids the risk of a reverse setting that looks fine but does not protect anyone.