
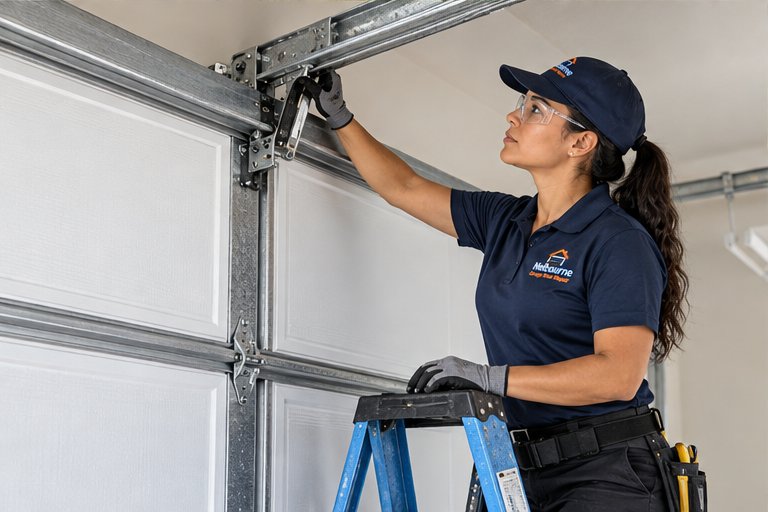
Why a closing door is more cautious than an opening one
A door heading down is the situation the opener worries about most. Something or someone could be under it, so manufacturers build in several layers of protection. When one of those layers sees a problem, the opener halts the door or reverses it.
That means a door that stops halfway on the way down is often doing its job, even if the reason is a minor one. A dirty sensor lens or a slightly stiff roller can look exactly like a serious fault from the driver's seat.
The challenge is working out which layer is reacting. The opener might be responding to the photo eyes, to resistance it feels in the motor, or to a position count that says the door should already be at the floor. Each cause leaves a slightly different trail.
Read the way it stops
Before you change anything, close the door a few times from a safe spot beside it and pay attention. Keep your hands and feet away from tracks and hinges at all times.
What the door does after it stops tells you a lot. A reversal back up usually means the opener thinks it hit something or saw an obstruction. A stop with no movement at all can point to a limit problem or a fault condition. A stop with blinking lights on the opener or sensors suggests a sensor or wiring issue.
- Does the door travel back up on its own after stopping?
- Do the opener lights blink after the door stops?
- Does it stop at the same spot each time?
- Does it close fully when you hold the wall button down, if your model allows that?
- Is the door stopping in the same place as in the past, or is the point moving?
Photo eye sensors and the invisible beam
Two small sensors sit near the floor on either side of the door opening. One sends an invisible beam and the other receives it. If anything breaks that beam while the door is closing, the opener stops or reverses.
Sensors that are dirty, knocked out of line, or damp can behave as if the beam is broken. Sunlight shining directly into a receiving eye in the afternoon can also confuse some older models. In a Florida garage, a spider web, a bit of mud from a wet floor, or condensation on a lens is enough to interrupt the signal.
Look at the small status light on each sensor. A steady light on both generally means they are aligned and communicating. A blinking or dark light on one of them tells you where to look first. Our page on safety sensor repair describes what we check, and the garage door sensor basics guide explains how the system works.
Gentle checks you can make
Wipe each lens with a soft, dry cloth. Make sure nothing is blocking the beam, and that both sensors point straight across the opening. If a bracket has loosened and the sensor is tilted, note which side it is. Do not take the sensors apart or cut or splice wires, and stop if you see exposed or damaged wire.
Signs the sensor is not the cause
If both lights are steady and the door still stops, the sensors are probably not the culprit. The same is true if the door reverses even when you hold a closed fist well away from the beam. Move on to the other causes rather than repeating the same wipe-down.
Down travel limits and the floor
The opener also has a setting for where the door should stop on the way down. If that point is set too high, the door may stop short of the floor because the opener believes it has arrived. If it is set too low, the door presses into the floor, feels resistance, and reverses.
A limit problem shows up as the same stopping spot each time and a smooth, normal sound. The door does not strain. It simply ends its trip in the wrong place, sometimes leaving a gap under the bottom edge.
Floors matter as well. A new slab coating, a thick mat, a raised threshold, or a lip of debris along the bottom edge can all shift where the door meets the ground. Settling in older garages can change the floor height slightly over the years. If the floor has changed, limits that once worked can become wrong without anyone touching the opener.
Friction in the tracks and rollers
Resistance during travel can make an opener quit early. The opener measures how hard it is working. When friction rises beyond what it expects, it assumes an obstruction and stops or reverses.
Tracks can gather dust, old grease, sand, and the sticky residue of coastal humidity. Rollers can wear, develop flat spots, or seize. A track that is slightly out of line can cause one side to drag.
A gentle visual inspection often reveals the cause. Look for rust streaks, sections of track that look polished from rubbing, rollers that do not turn, or gaps where the track has pulled from the wall. For work on tracks and hinges, see hinge and track service. For how the door moves in general, how a garage door works is a useful primer.
Track binding and misalignment
Binding is a more serious cousin of friction. Instead of general stiffness, the door catches at one point. A bent track section, a roller wedged at a curve, or a panel that has shifted can jam the travel.
Typical signs include a scraping noise, a visible kink in the metal, and a stop that happens at the same height each time. The door may also look slightly tilted as it stops.
Do not try to tap a track straight or loosen bolts to release the door. The track brackets sit close to parts under heavy tension, and pushing the wrong piece can cause a sudden shift. If the door has actually left its channel, read about a door that is off track. Otherwise stop using the door and let a technician inspect it.
Balance, weight and why the opener feels it
A well balanced door feels almost weightless in the middle of its travel. When springs lose strength, the door gets heavier, and on the way down it can move unevenly. The opener then senses strange loads and may stop to protect itself.
The opposite can happen too. A door that is lighter on one side or that falls too freely can make the opener hunt for the correct pace, triggering a stop. Either way, the opener's job becomes harder than it was designed to be.
Balance is not something to adjust at home. Spring and cable work involves forces that can injure people badly. If you suspect balance trouble, you can read about garage door weights and balance, then leave the actual diagnosis and any adjustment to a trained technician.
Force settings and a worn opener
The closing force setting decides how much resistance the opener will tolerate before it reverses. Some units let you adjust it, some adjust it automatically, and some are fixed. If the setting is set too low, even a normal amount of friction can cause a reversal.
Raising force is not a harmless fix. A door that pushes harder against an obstruction is a hazard, and the safety reversal feature depends on a sensible force level. If the opener has been tweaked to hide a mechanical problem, the underlying issue still needs to be addressed.
Older openers can lose their consistency. Gears wear, circuit boards age, and drive parts stretch. Our garage door opener repair page covers what we look at when a unit becomes unreliable, and the garage door safety tests guide explains the standard checks of the reversal feature.
Electrical and control causes
Occasionally the cause is not mechanical at all. A damaged wire between the opener and the sensors, a loose terminal, a chewed cable, or a failing control board can create intermittent stops.
The signs include sensors that work some days and not others, a door that behaves normally in the morning and acts up in the afternoon, or a stop that coincides with vibration from the garage door opener itself. Wires running along the wall and ceiling can be nicked by tools, stored items, or rodents.
Electrical checks should be gentle and limited to looking. Do not pull on wires or open the opener housing while it is plugged in. A technician can trace the wiring and test the control board safely, which is far easier than guessing.
Weather, humidity and the Space Coast garage
Along the Space Coast, a garage can swing from sticky heat to a cold, damp morning. Moisture condenses on sensor lenses and metal. Salt in the air adds a fine layer of corrosion to exposed hardware over time.
Summer storms bring wind-driven rain under door edges, and the water may leave grit that dries into a rough film along the track. In some seasons, door sections and seals can swell very slightly, increasing contact with the frame.
A habit of wiping sensors, checking the bottom seal, and keeping debris off the tracks reduces many of these issues. See garage doors in a coastal climate for more on how the local environment affects the door.
A simple order of checks
Working in a consistent order saves time and avoids confusion. Begin with the easy visual items, and stop whenever something looks damaged or you feel unsure.
- Clear anything from the floor and the doorway, including mats and debris.
- Look at both sensor lights and wipe both lenses.
- Check that sensors are aimed straight across the opening.
- Look along both tracks for dents, rust streaks, or loose brackets.
- Listen for scraping, popping, or grinding as the door moves.
- Note whether the door stops at the same point every time.
- Look at the opener for blinking lights and count the pattern.
When to stop and call
Some findings should end your own checking right away. A visibly bent track, a frayed cable, a gap in a spring, a door that tilts, or a loud bang earlier in the day all call for professional help.
If a part of the door seems loose or the door falls when you release it, keep everyone away. Do not stand or walk under the door, and keep vehicles clear. If someone is hurt, call 911.
For anything involving springs, cables, drums, or the brackets that hold them, a trained technician is the only safe option. The tension in those parts is easily enough to cause serious injury.
Using the manual release carefully
If the door is stuck partway and you need to get a vehicle in or out, the manual release can disconnect the opener from the door. This is the red cord hanging from the trolley. It should only be used when the door is fully closed or fully resting on the floor, never while the door is held up partway by the opener.
A door that is partway open and disconnected could drop if a spring or cable has a problem. If the door is stopped in mid-air, do not pull the release. Keep clear and call for help. Our guide to using the manual release during an outage explains the careful way to handle it when the door is down.
Recent changes that often explain a new problem
A door that worked well for years and suddenly stops halfway usually has a recent event behind it. Think back over the past few weeks before you assume a part has failed on its own.
Did anyone paint the garage floor, lay a new mat, or install a shelf near the door? Was a new vehicle with a roof rack or a tall antenna parked close to the sensors? Did a storm blow debris into the garage, or did the power flicker and reset the opener? Any of these can change what the opener sees or feels.
Remote and keypad changes matter too. A new accessory, a second opener on the same circuit, or a recently replaced opener can introduce settings that were never fully dialed in. Telling the technician about these changes shortens the search and helps us explain the cause clearly.
- New floor coating, mat, or raised threshold
- Items stored closer to the door or sensors than before
- A recent storm, power flicker, or surge
- A replaced remote, keypad, or opener
- Work done by a painter, contractor, or other trade in the garage
What we do when we arrive
We watch the door close, then inspect the sensors, the wiring, the tracks, the rollers, the springs, the cables, and the opener. We check balance with care and test the safety reversal.
We would rather find the actual cause than just raise a setting. A stop that comes back after an adjustment usually has a mechanical reason, and fixing only the setting would hide a real problem. After the inspection we explain what we found and what the options are.
Some visits involve a small realignment or a cleaning. Others involve replacing worn rollers, a damaged track section, a faulty sensor, or an opener part. Whatever the result, we lay out what each option involves so you can decide how to proceed.
Causes compared at a glance
This table pairs common clues with likely causes. It is a guide to help you describe what you see, not a substitute for an inspection.
| Clue | Likely area | Reasonable next step |
|---|---|---|
| Opener lights blink, door reverses | Photo eye sensors | Wipe lenses and check alignment |
| Stops just above the floor, smooth | Down travel limit | Check the manual or call |
| Reverses on touching the floor | Limit too low or floor changed | Call for adjustment |
| Scraping sound before stopping | Track binding or worn roller | Stop using and call |
| Door feels heavy by hand | Spring tension or balance | Do not adjust, call |
| Stops only some days | Wiring or moisture | Inspect visually, then call |
| Stops after a recent storm | Debris or shifted track | Clear debris, then call |
Questions and answers
The opener usually believes something is in the way. That could be a broken sensor beam, a patch of friction it reads as resistance, or a travel setting that is off. Wiping the sensor lenses and checking for debris are safe first steps. If it continues, a technician should inspect the sensors, track, and opener.
Yes, it can be. The reversal feature protects people, pets, and property from a door that would otherwise keep closing. Defeating it by taping over a sensor or raising force too high removes that protection and hides the real problem. Please have the cause fixed instead of working around it.
Absolutely. A thin film of dust, damp, or a spider web across a lens can interrupt the signal, and the opener treats that as an obstruction. Wiping both lenses with a soft dry cloth and checking that both status lights are steady solves many cases without any parts.
That behavior often points to a sensor or sensor wiring problem, because the opener allows a held button to override the beam on many models. It is a warning sign, not a solution. Have the sensors and wiring tested so the door can close normally and safely.
Yes. A roller that is cracked, flat, or seized adds drag, and the opener may read that as an obstruction. You might also hear scraping or see the door tilt slightly. Roller replacement is common work for a technician and is better done properly than patched.
Lubricating the right parts helps, but tracks themselves should generally be cleaned, not heavily greased, because grease collects dust and grit. Use a product intended for garage doors on rollers, hinges, and the springs only as the manufacturer directs, and leave heavy spring work to professionals.
It can. Condensation on sensor lenses, swollen seals, and added friction from damp, salty air all show up along the coast. Wiping sensors and keeping tracks clean reduces the effect. If problems follow the weather and keep coming back, an inspection can find the worn part behind it.