
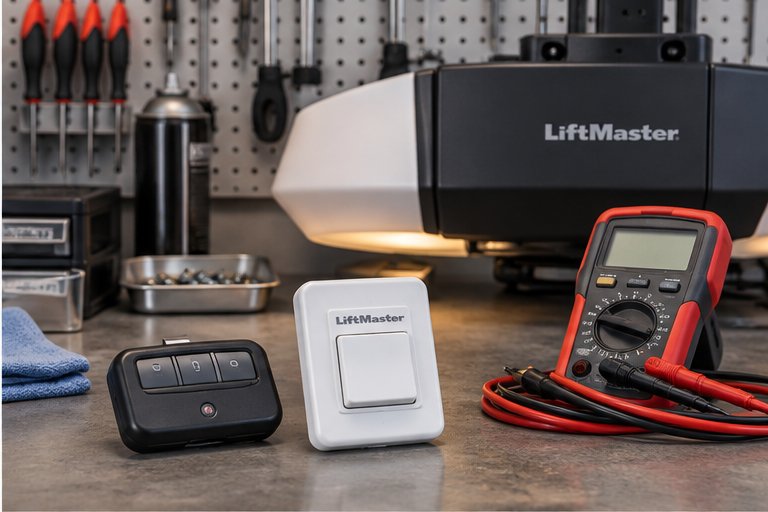
Reading the Symptoms You See
Different failures leave different clues. Matching your symptom to the table below will not replace an inspection, but it gives you a sensible starting point and helps you describe the problem clearly when you call.
| What you notice | Likely area | Safe first step |
|---|---|---|
| Button does nothing, remote works | Button, wire or terminal connection | Look at the button and the visible wire for damage |
| Button light is off, opener light works | Wire between button and opener | Check for a pinched or pulled wire at the wall |
| Button lights up but door will not move | Lock or vacation mode, or opener logic | Look for a lock setting on the control |
| Button works only when pressed hard | Worn contacts inside the button | Note it for the technician, do not force it |
| Button clicks the opener but door stays down | Sensor circuit or spring issue | Check sensor lights, then stop and call |
| Nothing works at all | Power supply to the opener | Check the outlet and plug with a lamp |
The Lock or Vacation Setting on the Control
Many wall controls have a lock, vacation or secure setting. When it is active, the button may still glow or beep, but the opener ignores the remotes, and on some models it ignores the button too. People often switch it on while travelling and forget about it, or a child presses it by accident.
Look at the control closely. Some have a small slider or a separate lock button. Others need you to press and hold the main button for a few seconds to switch the mode off. The method varies by make and model, so your opener's manual is the most reliable guide to what your control does.
If you cannot find the setting or the manual, do not start pressing random combinations of buttons. Some combinations erase the learned remotes or change the settings. Leave it as it is and let a technician read the control and the opener together.
Power at the Opener and the Outlet
An opener needs ordinary household power, usually from an outlet on the garage ceiling. If that outlet has lost power, the wall button has nothing to talk to. Garage outlets often sit on a ground fault protected circuit, and those trip more easily than most, especially in humid weather or after a storm.
A simple lamp test can tell you if the outlet is live, but only if you can reach it without a ladder on uneven ground and without touching the opener. If the outlet is above the door travel area or you feel unsure about reaching it, stop there. A reset button on a nearby outlet or a tripped breaker in the panel are common, harmless causes worth checking.
When a tripped circuit keeps tripping
If a reset works once and the circuit trips again soon after, do not keep resetting it. Repeated tripping can mean water in an outlet, a failing motor or a wiring fault. That needs a proper look, and possibly an electrician, rather than another reset.
Power surges and storms
Thunderstorms are a regular part of life on the Space Coast. A nearby strike or a power surge can damage the opener's circuit board while leaving the lights and the door looking normal. The board may stop reading the button or the remotes after such an event.
The Two Thin Wires and Why They Fail
The wire from the wall button to the opener is usually thin bell-type wire, run along the wall and the ceiling, often held by small staples. It is made to be light, not tough. It can be nicked, stretched, stapled too tightly, chewed by rodents or snagged by stored items.
A break inside the insulation is hard to see. The wire may look fine while the metal core is cut. That is why a button can work one day and not the next, depending on how the wire sits when the garage warms up or a door slams.
- Staples driven through the insulation can pinch the wire and short the two conductors together.
- Wire pulled tight when a shelf, a ladder or a box was moved can loosen or break connections at either end.
- Rodents and insects sometimes strip insulation, particularly where wire runs near the ceiling.
- A wire that has been spliced in the past with simple twists may corrode at the splice.
Moisture, Salt and Corrosion in a Florida Garage
Garages near the Indian River Lagoon and the Atlantic coast face humidity, salt air and the occasional wind-driven rain. Over the years, that moisture creeps into the small terminals behind the wall button and at the back of the opener. The metal turns dull, then green or white, and the signal can no longer pass cleanly.
You may see this as a button that works on dry days and fails after rain. You may also see a faint powdery deposit around the screw terminals if the cover is off. A technician can clean or replace the terminals and reseat the wires. Spraying cleaners or lubricants into the button yourself is not a good idea, because it can leave residue that makes the contacts worse.
Condensation behind the control
Cool walls and warm, damp air meet behind the control and form droplets inside the plastic housing. This is more common in garages that are closed up and unconditioned. The button may act strangely until the housing dries.
Types of Wall Controls You May Have
Not every wall control is the same, and the type changes how the problem shows up. Knowing which one you have makes the conversation with a technician much easier.
Simple single button
This is a plain push button with a light or no light at all. It sends one signal. When it fails, it is usually the wire, the terminals or the contacts inside.
Multifunction panel
These panels have a large door button plus separate light and lock buttons, and often a small display or glowing indicator. They carry more electronics, so they have more ways to fail, including a lost memory or a stuck lock mode.
Wireless wall control
Some systems use a wall station powered by a battery that talks to the opener by radio. In that case there are no wires to check, but a weak battery or a lost pairing with the opener are common reasons it stops responding.
When the Opener Itself Is the Problem
If the button, its wire and the power all look sound, the fault may be in the opener's logic board, the part that listens for the button and the remote. These boards can fail from age, heat, moisture or a surge. A damaged board may ignore the button while still lighting the lamp or responding to the remote.
Boards also depend on other inputs. If the safety sensors do not report a clear path, many openers will refuse to close, and some will give mixed results at the wall. You can read more about that behaviour in our page on sensor lights that blink.
A technician can test the opener's terminals directly, using a meter, to see if the signal from the button is arriving and whether the board reacts. That settles the question without guesswork, and it decides whether repair or replacement of the board or the opener makes sense.
Checks You Can Safely Do Yourself
A few careful checks can save you a visit or at least give us better information. Do them from the floor, with the door closed or fully open, and stop the moment anything seems unclear or you would need to reach near the door's moving parts.
Keep your hands, tools and ladder away from the springs, cables, brackets and the bottom corners of the door. These parts hold heavy tension and cause serious injuries.
- Try the remote and note whether it works. Replace the remote's battery if it seems weak, then try again.
- Look at the wall button for cracks, moisture, a loose cover or a visible loose wire. Do not pull on the wire.
- Check for a lock or vacation setting on a multifunction control, following the manual if you have it.
- Confirm the opener has power by watching for its light or by looking at the outlet from the floor.
- Wipe the safety sensor lenses gently with a soft dry cloth and make sure nothing blocks the beam.
- Write down what you saw, what you heard and what changed recently, such as a storm, a new shelf or a power cut.
What Not to Do
The urge to solve a wall button problem with a screwdriver is natural, and it leads to a few common mistakes. Some are harmless, but some turn a small repair into a larger one.
Do not touch the springs, the cables or the brackets at the bottom of the door while troubleshooting. Do not climb onto a ladder to open the opener's housing. Do not bridge the button terminals with a wire or a screwdriver to test for a signal, since the wrong contact can damage the board. Do not cut and rejoin the button wire without knowing where the fault lies.
If anyone is hurt, call 911 first. For anything else, switching to a manual release carefully, with the door fully closed, can let you use the door while you wait. Our guide on using the manual release explains the steps and the stop points.
What a Technician Does on a Visit
We come to the property, look at the door and the opener, and explain what we find. For a wall button complaint, that usually means testing the signal at the button, at the wire and at the opener's terminals, then checking the board and the sensors.
The work is methodical because the answer can be one of several inexpensive-looking causes, and we want to name the right one. When a part has failed, we explain the options, whether that is a new button, a replacement wire run, a cleaned terminal or a board repair. Our page on wall control and opener light repair describes this service in more detail.
If the opener is old or the board has failed, we will talk through whether repair or replacement makes more sense. Our opener repair page helps you prepare for that discussion.
Questions and answers
A glowing button means the control has power, but it does not prove the signal reaches the opener. The cause may be a lock or vacation setting on the control, a blocked safety sensor, or a fault on the opener's logic board. Check for a lock setting and look at the sensor lights, and if neither explains it, have a technician test the signal at the opener.
Some people do, but it carries some risk. You need to turn off power first, match the correct control to your opener, and connect the thin wires properly. A mismatched control or a short can damage the board. If the wiring above the door or near moving parts needs touching, it is better to let us handle it safely.
Probably not. If the remote works, the opener is receiving and moving the door, so the board is alive. The problem is most likely the button, its wire or a terminal connection. That is often a straightforward repair once the exact break has been found with a meter.
Intermittent behaviour usually points to a loose connection, a nicked wire, a corroded terminal or moisture in the housing. These faults change with temperature, humidity and vibration, so the button works one day and not the next. A technician can trace the wire and clean or replace the weak point.
A surge can damage the wall control, but it is more often the opener's logic board that suffers. After a storm or an outage, if the button and remotes both stop responding, the board is a likely suspect. A technician can test it and explain whether repair or replacement is sensible.
Usually yes, as long as the door moves normally and the safety sensors still work. Test the door's reversal from time to time and do not bypass any safety feature. If the door behaves strangely, stop using the opener and have the system checked.
That depends on the opener's age, the condition of its board and motor, and whether parts are available. A technician can look at the whole system and explain the options in plain terms. We will tell you what we find and what the choices are, and you decide.