
Why it helps to know the routine
A garage door is the largest moving object in most homes, and it works under real tension and weight. Because of that, a proper service visit is more structured than people expect. It is not just a matter of oiling a squeaky part and leaving. A good visit has a pattern: listen, look, test, explain, repair and verify.
Knowing the pattern makes you a better partner in the process. You can describe the symptoms in a way that points the technician in the right direction, you can clear the right space, and you can judge whether the explanation you receive is complete. None of this requires technical knowledge, only a little preparation.
This guide is written for homeowners and small business owners on the Space Coast. It describes the general flow of a visit from a maintenance appointment to a repair call, and it points out where the details can change depending on what the door needs.
Before anyone arrives: describing the problem
The visit really begins with the first conversation. When you get in touch, you will be asked what the door is doing. The more specific you can be, the more useful that description is. Saying the door is broken tells very little. Saying the opener hums but the door will not lift, or that there was a loud bang from the garage last night, tells a great deal.
Try to note what changed and when. Did the problem start after a storm, after a power flicker, after someone backed into the door, or gradually over weeks? Does it happen every time or only sometimes? Does it happen with the remote, the wall button, or both? These small facts shorten the search for the cause.
- What the door does or fails to do, in plain words
- Any sounds: bang, grinding, scraping, humming, clicking or silence
- Whether the door is stuck open, stuck closed, or somewhere in between
- Whether the opener light, sensors or wall control show any lights or blinking
- Anything that happened shortly before the problem began
Making the garage ready
A little preparation helps the visit go smoothly. Clear the area around the door and the space beside it so the technician can reach the tracks, the springs and the opener without moving boxes first. If the door is open or partly open, leave it as it is unless it is in a position that is unsafe to stand near.
Park vehicles outside if you can. A door that is stuck partway can be a hazard above a car, and a clear floor makes the work easier. Secure pets and keep children away from the garage while work is going on. Moving parts, tools and tensioned components are not a place for curious visitors.
If the door is stuck and you have to get a vehicle out, do not force it. Read the guide to using the manual release safely first, and stop if anything looks bent, off track or under strain.
The arrival and the first conversation
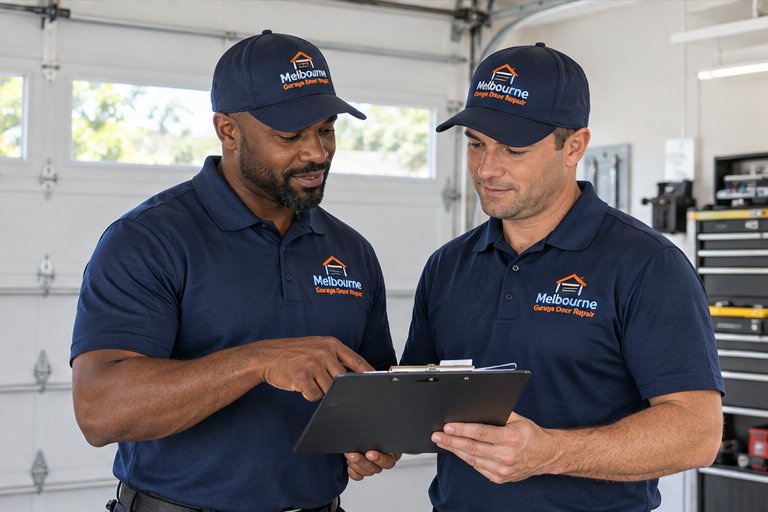
When the technician arrives, the first few minutes are a conversation, not a repair. A good technician will ask you to describe the problem again in your own words, even if you already did so earlier. People remember extra details when they stand in front of the door and show what happens.
This is also the time to mention any history. If the door has been repaired before, if parts were replaced, if the opener is much older than the door, or if there was an earlier incident such as a vehicle bumping the panels, say so. Past repairs often explain present behavior.
Expect questions about how the door is used. A door that cycles several times each day behaves differently over the years than one that cycles rarely. Households with several drivers, home businesses and rental properties tend to put more wear on springs and rollers, and that is useful context.
The first look: reading the door from the floor
Before touching anything, an experienced technician stands back and reads the door. Is it level across the top edge? Do the horizontal joints between panels run straight? Is there a gap along one side, a sag in the middle, a cable hanging loose or a spring that looks separated?
A lot of information is visible from the floor. The condition of the tracks, the position of the rollers, the state of the hinges and the way the door sits in its opening all tell a story. This stage is also where safety is assessed. If something is under strain, the technician decides how to proceed before any hands go near it.
You are welcome to watch from a safe distance and ask what is being noticed. A calm technician will usually be happy to point things out, such as a worn roller or a frayed cable strand, so that you can see the reason behind the recommendation later.
Testing the door in operation
Where it is safe to do so, the next step is to see the door move. The technician will run it with the opener and listen. A healthy door moves smoothly and evenly. Scraping, popping, shuddering, hesitation, a door that races at the end of its travel, or an opener that strains are all clues.
The door may also be operated by hand with the opener disconnected. This is how a technician judges balance. A well balanced door feels manageable to lift and tends to stay where it is left. A door that is heavy, or that drifts up or down on its own, is telling you that the spring system needs attention.
Not every door can be tested this way. If a spring has broken or a cable has come off its drum, running the opener can cause more damage, so the technician may skip the powered test and move straight to securing the door. You can read more about what a broken spring means on the torsion spring repair page.
The safety checks that happen on every visit
Whatever brought the technician to your garage, a responsible visit includes a look at the safety systems. These are the features that protect people and property, and they can wear out or drift out of adjustment without anyone noticing.
The two most familiar are the photo eye sensors near the floor and the auto-reverse behavior of the opener. The sensors should see each other across the opening and stop the door if something passes between them. The opener should reverse when the closing door meets resistance. If either of these is not behaving, it is worth knowing about whether or not it was the reason for the visit.
Sensors and reversing
Technicians check that the sensor lenses are clean and aimed at each other, that the indicator lights show a healthy connection, and that the door reverses when something interrupts the beam. They also check the reversal behavior when the door meets an obstruction. Our guide to garage door safety tests explains what each test is meant to show.
Release handle and wall control
The emergency release should be reachable and should work as designed. The wall control and any lock should behave normally. These small items matter most on the day you need them, such as during a power outage.
Looking closely at the hardware
After the overall assessment, attention moves to the parts. Rollers are checked for wear, flat spots and wobble. Hinges are checked for cracks, loose mounting and elongated holes. Tracks are checked for dents, flat spots, loose brackets and alignment. Each of these parts affects how smoothly the door travels.
The technician will also look at the cables, the drums, the bearings and the springs, but without adjusting them casually. These parts hold stored energy. Anything beyond a visual inspection of them is done deliberately, with the right tools and with the door secured, which is why they are not a do it yourself area.
Fasteners are a common finding. Years of vibration loosen bolts that hold the track, the hinges and the opener bracket. Tightening them properly is a normal part of service and often makes a noisy door noticeably calmer.
- Rollers: wear, cracks, flat spots, play on the stem
- Hinges: cracked leaves, loose screws, worn pivot points
- Tracks: dents, flatness, alignment, tight brackets
- Cables and drums: fraying, seating, rust
- Springs and bearings: visible condition, gaps, rust, end fittings
The opener gets its own examination
The opener is often blamed for problems that really belong to the door, and the reverse is also true. A technician separates the two. With the door disconnected from the opener, the opener is run on its own to see whether it travels, stops and reverses correctly. Then the door is moved by hand to see whether it is the heavier part of the puzzle.
Rail, chain or belt condition, the travel limits, the force settings, the logic board behavior and the connection between the opener and the door are all part of this step. Remote and keypad behavior may also be tested. If your opener is older and parts are scarce, the technician may discuss whether repairing it or replacing it makes more sense.
Notice that an opener decision is not made in a hurry. A good technician will explain the reasons and let you decide how to proceed.
The explanation: what was found
Once the inspection is done, the technician should sit down with you, figuratively at least, and explain what was found. This is the most valuable part of the visit. You should hear what is wrong, why it happened, whether it is urgent for safety, and what the options are.
A clear explanation names parts and describes their condition in ordinary language. For example, a technician might say that the left cable is frayed where it winds onto the drum, that the door is lifting unevenly because of it, and that the matching spring should be examined at the same time. That kind of statement lets you understand the logic of the recommendation.
You can ask to be shown the worn or damaged part. Seeing a cracked hinge or a flattened roller makes the recommendation concrete. If anything is unclear, ask again. There is no reason to approve work you do not understand.
Options, and how recommendations are shaped
Most findings have more than one path. A worn roller can be replaced alone or the full set can be replaced together. A single broken spring can be replaced, but the matching spring is usually changed too. A badly damaged panel might be repaired or the section replaced. The technician should lay out the choices and the reasoning behind them.
Safety comes first in the ordering of recommendations. A problem that could injure someone or cause the door to fall gets priority. After that come items that protect other parts, such as a worn roller that is scraping the track. Last are comfort items such as noise and appearance.
If you want to understand how the decision between repair and replacement is made for a whole door, our repair or replace guide covers it in more detail. Ask questions until you feel the plan is sensible for your situation, and take the time you need.
The repair itself
When you approve the work, the technician will secure the door and prepare the area. Work on springs and cables is done with winding bars, clamps and a clear procedure, never improvised. Parts are matched to the weight and size of the door rather than guessed.
Matching is an important idea. A spring has a size, a length, a wire diameter and a winding direction, and it has to suit the weight of the door it lifts. Using a spring that is nearly right can make a door heavy, noisy or unsafe. This is one of the reasons a visit includes weighing and measuring rather than assuming.
While the work proceeds, the technician may find a second issue that was hidden behind the first. This is common, because one failed part often stresses its neighbors. If that happens, you should be told, shown the reason and given the choice about what to do next.
Balance, adjustment and lubrication
After a repair, the door is balanced. This means checking that the springs carry the weight correctly so that the door stays still when stopped halfway and moves without strain. Balance affects the life of the opener, the cables, the rollers and everything else, so it is not a step to skip.
Lubrication is done carefully and with the right material on the right parts. Hinges, roller stems and spring coils receive a suitable lubricant, while the track faces usually stay clean rather than greasy, because grease collects dirt. Which parts need what depends on the material and the job.
Travel limits and force settings on the opener are also reviewed after the door has been repaired. A change in the door's behavior can mean that the opener's earlier settings no longer suit it.
The final test and the walk through
The last step is a full test. The door is cycled several times with the opener, with the remote and with the wall control. The sensors are tested, the reversal behavior is confirmed and the door is observed for smooth, even travel from open to closed.
You should be walked through what changed. That includes what was replaced, what was adjusted, what to watch for in the coming weeks and which simple checks you can do yourself. If the technician noticed items that are not urgent but worth planning for, such as aging rollers, they should be mentioned plainly without pressure.
Take a minute to try the door yourself with the remote and the wall button. This is the right moment to say if anything feels unfamiliar. It is far easier to address a concern while the technician is still standing in the garage.
After the visit: keeping the door healthy
A repaired door will serve you better if it is looked after. The simplest habit is a short monthly look and listen routine, which our monthly garage door checklist lays out in plain steps. Watching for new sounds, new slowness or a change in how the door hangs when stopped catches problems while they are small.
In Florida, the climate adds its own wear. Salt air, humidity, heat and storm seasons all act on metal, seals and lubricants. A door near the coast may need more frequent attention than one inland, and the weeks before hurricane season are a sensible time to have everything checked.
Keep a note of what was done and when. It makes the next visit easier, since the next technician can see the history instead of starting from nothing.
Questions and answers
It helps if an adult who can approve work is present, at least for the explanation and the final test. You do not have to watch every step. Staying nearby lets the technician show you worn parts, answer questions and confirm the plan with you before anything is repaired or replaced on your door.
Clear a path to the door, the tracks and the opener, and move vehicles outside if you can. Keep children and pets away from the area. Write down the symptoms and when they started. If you want to read about handling the door in the meantime, see our guide to the manual release.
Yes. We look at the door, test it, and explain what we find and what the options are before work begins. You can ask to see worn or damaged parts. Nothing needs to be approved until you understand the reason for it and feel comfortable with the plan.
They overlap but have different goals. A repair visit begins with a specific failure. A maintenance visit looks at the whole system to catch wear early, tighten hardware, lubricate moving parts and test safety features. Both include inspection, explanation and testing. See our maintenance and tune-up page for more detail.
Sensors and auto-reverse protect people and property, and they can drift without notice. Checking them takes little effort during a visit and tells you something important about the state of your system. If they are not working properly, you will know, even if they were not the reason you called.
It happens often, because one failing part can stress another. You should be shown the finding, told why it matters and given the choice of what to do. Urgent safety items are explained clearly, and items that can wait are described as such so you can plan without pressure.
Absolutely. Ask what a part does, why it needs to change and what the alternatives are. Keep a safe distance from tensioned components while work is going on, but speak up whenever something is unclear. A good visit leaves you understanding your door better than before.