
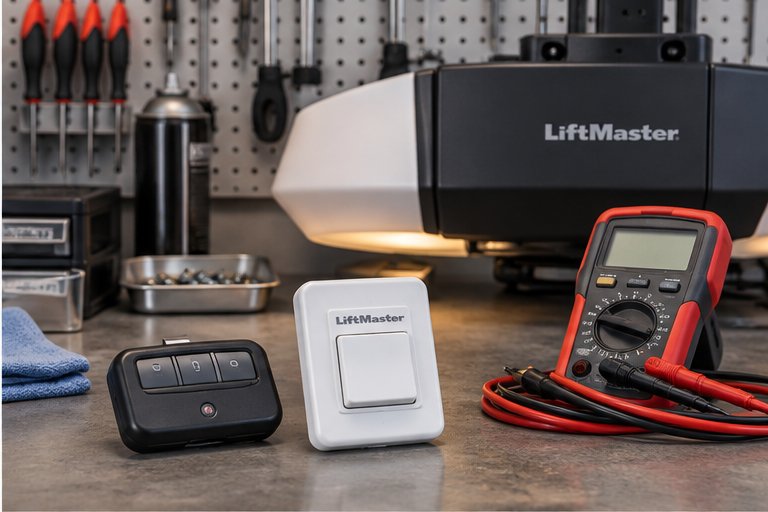
Why remotes need to be paired
A garage remote is a small radio transmitter. Your opener contains a receiver that listens for signals. For the opener to obey a remote, it must first recognize that remote as one it is allowed to trust. Pairing is the step that teaches the opener about a new transmitter.
Without that step, anyone with a similar remote could operate your door. Pairing keeps the system private to your household, and it is the reason that a remote bought separately will not simply work out of the box. A little patience during setup pays off in lasting reliability.
Pairing is also a chance to take stock. When you gather every remote, you may find that some are missing, damaged or no longer needed. Deciding which ones to keep and which to retire is a simple security step that costs nothing but a few minutes.
Where the manual comes first
We want to be direct about one point. The exact button sequence depends on the opener model and on the remote. The steps in this guide describe the general idea, not a recipe for any particular unit. Your owner's manual is the authority for your opener.
If you no longer have the manual, look for the model number on the opener's power head. It is usually on a label on the side or underneath. With the model number you can often find the manual from the maker, or a technician can identify the correct steps during a visit.
The rolling code idea
Modern openers use rolling codes, sometimes called changing codes. Each time you press a remote, it transmits a different code from a very long sequence that only the opener and the remote share. The opener keeps track of where in the sequence the remote should be and accepts only the next valid code.
The result is security. If someone records the signal from your remote, they cannot replay it later, because the opener has already moved on to the next code. Older openers that used a fixed code did not have this protection, which is one reason they are worth replacing.
Rolling code also explains why pairing is a deliberate act. The opener and the remote must be introduced so that they share the starting point and the rules of the sequence.
A practical consequence is that a remote pressed many times out of range can sometimes fall out of step with the opener. Most systems allow for a window of skipped codes, and a pairing refresh restores the link if the gap becomes too large. Children playing with a remote in another room are a common cause of this.
The general steps for pairing a remote
The sequence below shows the common shape of the procedure. Models differ in the number of presses, the timing and the way the opener confirms success. Follow your manual for the specifics.
If the opener confirms the pairing but the remote still does nothing when you test it, wait a moment and try again from closer range. Some openers need a second to store the new code. If the test fails twice, repeat the whole sequence from the start rather than pressing buttons at random.
- Make sure the door area is clear and nothing is blocking the sensors.
- Locate the learn button on the power head of the opener.
- Press and release the learn button, or hold it as the manual directs, until the status light indicates a listening mode.
- Within the allowed time, press the button on the remote that you want to assign.
- Watch for the confirmation, such as a light blink or a click from the opener.
- Test the remote from inside the garage, then from the driveway, while watching the door.
Pairing a wireless keypad
A wireless keypad mounts outside the garage and lets you open the door with a personal number. Pairing it usually combines the opener's learn step with entering your chosen code on the keypad itself.
The general flow is to put the opener into learn mode, enter the number you want on the keypad, and press the keypad's enter key. The opener confirms that it has stored the code. Choose a number that is hard to guess and not tied to an address, a birthday or a repeated digit.
Test the keypad after pairing by entering the code from a normal standing position outside the door. Make sure the buttons respond with a light or a click, and that the door starts moving once you press enter. If the code works from the ladder but not from the driveway, check the keypad battery and its distance from the opener.
Choosing and changing a code
Pick something you can remember but that others cannot guess easily. Change it when a contractor, tenant or guest no longer needs entry. Many keypads also allow temporary codes that expire.
Mounting and weather
Keypads live outdoors, so water, heat and salt air all test them. Mount the keypad where it is shaded and out of direct spray. Our page on a keypad that is not working covers the usual causes of trouble.
In-vehicle controls and built-in transmitters
Many cars include a built-in garage control in the mirror or overhead console. These are paired in a separate procedure, and some rolling code openers require an extra step on the opener itself, often involving the learn button, so that the opener accepts the car's transmitter.
The car's manual describes its side of the process, and the opener's manual describes the opener's side. Both are needed. If the pairing seems to start but never finishes, the mismatch is often in the extra step on the opener.
Clearing old remotes from memory
Most openers allow you to erase every paired remote at once, usually by holding the learn button for a set time. This is useful when a remote is lost, when you buy a home, or when a former tenant or contractor may still hold a transmitter.
After clearing the memory, you must pair every remote and keypad you intend to keep. Plan ahead and gather them all before you begin. Some openers also allow single-device removal, which is gentler, so check what your model supports.
- Lost or stolen remote: clear the memory and re-pair the ones you still hold.
- New home: clear all prior devices before you start using the garage.
- Rental turnover: clear the memory between tenants.
- Contractor access ended: remove or clear the code used by the contractor.
Remote batteries and signal strength
Before assuming a remote needs reprogramming, check its battery. A weak battery shortens range and makes the remote seem unreliable. The battery is usually a small coin cell that is replaced after opening the case, and the type is printed on the old cell.
If the remote works only when you stand close to the garage, the battery is the most likely cause. Replace it, test again from a distance and observe whether the range returns. Our page on a remote that is not working gives a fuller list of causes.
Heat and humidity shorten battery life, and a remote left on a dashboard in summer sun suffers most. Keeping it in a cooler spot, or clipping it to a key ring, extends its working life. Always dispose of small coin cells responsibly and keep spares away from young children.
Two doors, several remotes, one household
Homes with two single doors, or a main garage and a workshop, often have two openers. A multi-button remote can be paired with each opener separately, so one button operates one door. The pairing steps are repeated on each opener, using a different button each time.
Keep track of which button belongs to which door. A small label or a sticker on the back of the remote avoids confusion, especially for children or guests who borrow it. If the buttons get mixed up, clearing the memory on one opener and starting that pairing again is usually the cleanest fix.
Households with many drivers should also think about how many devices the opener can store. Most units hold a generous number, but not an unlimited one. When the memory fills, older devices must be cleared before new ones are added.
- Label each button with the door it controls.
- Pair the second opener only after the first one works properly.
- Note how many devices your model allows in the manual.
- Keep a spare remote stored at home rather than in a vehicle.
Common reasons a pairing fails
When pairing does not work, the cause is usually something small. A short list of likely culprits will solve most cases without a service call.
Timing is the most common one. The listening window is short, and a slow press on the remote means the opener has already stopped waiting. Try again with the remote ready.
If you have tried the simple fixes twice and nothing changes, stop. Repeated attempts will not harm a healthy opener, but they rarely succeed when the cause is a failed receiver or an incompatible remote. A technician can test the receiver and tell you what is going on.
- The remote is not compatible with the opener's signal system.
- The remote battery is weak or inserted incorrectly.
- The learn mode timed out before the remote was pressed.
- The opener memory is full and needs clearing.
- The wrong button was pressed, or the remote has several buttons assigned to different doors.
- The antenna wire on the opener is damaged or tucked against metal.
Compatibility between remotes and openers
Not every remote works with every opener. Frequency, code format and brand-specific features all play a role. Universal remotes exist, but they depend on the opener's signal system and are paired differently from original ones.
Look at the label on the old remote and the opener for model numbers and any color or frequency marks. A technician can match them for you, which is more reliable than guessing from a photograph. If a remote is not compatible, no amount of pressing the learn button will help.
Age is a factor here. An opener from many years ago may not accept modern remotes at all, and its own receiver may be wearing out. When replacement remotes are hard to find for an older unit, it is often a sign that the opener itself is nearing the end of its useful life, and a conversation about replacement is reasonable.
Security habits for remotes and codes
A remote is a key, and it deserves the same care. Do not leave one clipped to a visor where a thief can find it in a parked car. Take it with you, or keep it out of sight if you must leave it.
Treat keypad codes the same way. Do not share them casually, and change them from time to time. If a vehicle is stolen with a remote inside, clear the opener's memory and pair new devices. That small step closes the door on anyone who tries to use the stolen remote.
Think about who else has access. Tenants, former house cleaners, contractors and previous owners may all hold remotes or codes. A periodic reset of the opener's memory, followed by fresh pairings, is a tidy habit every few years and after any change in who lives or works at the property.
Programming and your safety
Pairing involves working on or near the opener, but it does not involve the springs, the cables or the brackets. Never touch those parts while you are looking for the learn button or testing the door. They hold dangerous tension.
Keep people and pets clear of the door when you test a new remote, and watch the door while you press the button. Our guide on garage door safety tests explains how to confirm that the sensors and reversal still work after you have finished.
When to call a technician instead
Some problems are beyond a pairing procedure. If the opener does not respond to the wall button, if the status light blinks an error pattern, or if the opener is old and does not support current remotes, a technician can diagnose it properly.
Our page on remote and keypad programming describes how we help with pairing, replacement and clearing the memory, and what we explain during the visit. We look at the opener first so that you know what you are working with.
It is also worth calling if you inherit a garage with unknown remotes, such as after buying a home. Clearing the memory and pairing fresh devices is a sensible security step, and a visit lets us confirm the sensors, travel limits and reversal at the same time.
A short checklist before you begin
A little preparation turns a frustrating job into a simple one. Gather what you need before you climb the ladder.
- The owner's manual or the opener's model number
- Fresh batteries in the remote and the keypad
- Every remote and keypad you want to keep
- A stable ladder placed away from the door's path
- Someone to help watch the door while you test
Questions and answers
Usually yes. The opener's learn button is on the power head on the ceiling, so you need to reach it. Some keypads and in-vehicle systems add steps on the car or outdoor panel. Have the remote in hand and the door area clear before you begin, and follow the manual for your model.
Common reasons include a weak battery, a missed timing window, an incompatible remote or a full opener memory. Replace the battery, try again with the remote ready, and check the model numbers. If it still will not pair, a technician can confirm compatibility and the condition of the opener's receiver.
It is a security method where the remote sends a different code each time from a long sequence, and the opener only accepts the next valid one. A recorded signal cannot be replayed to open the door. It is standard on modern openers and is a reason to replace very old fixed code units.
Most openers let you erase all paired devices by holding the learn button for a set time, then you re-pair the remotes you want to keep. Some allow removal of a single device. The exact method depends on the model, so check the manual or ask a technician to do it for you.
Often yes. In-vehicle controls are paired in a separate process, and some rolling code openers need an extra step on the opener to accept the car. You will need both the car's manual and the opener's manual. If the process stalls, the opener-side step is the usual culprit.
Check the keypad battery first, then try entering the code close to the door. Weather and salt air can affect keypads outdoors. If it still does not respond, re-pairing may help, following the manual. A technician can check the keypad and the opener's receiver if problems continue.
Pairing is a reasonable task for a careful homeowner, provided you use a stable ladder, keep the door path clear and stay away from the springs, cables and brackets. Stop if anything seems unclear or the opener behaves oddly, and ask a technician. Safety always outranks finishing the job.