
How a Garage Remote Talks to the Opener
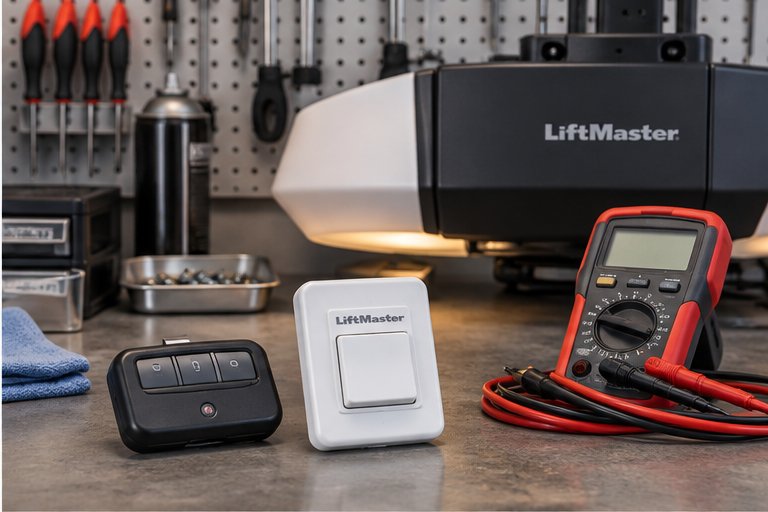
A garage door remote is a tiny radio transmitter. When you press the button, it sends a coded signal to a receiver built into the opener motor unit, which is the box mounted on the garage ceiling. If the receiver recognizes the code, it starts the motor and the door moves.
Three things have to line up for this to work. The remote needs enough power to send the signal, the opener needs to receive it clearly, and the two need to share the same code. A problem with any one of the three can make the remote seem dead.
Knowing this helps you troubleshoot in a logical order, instead of pressing buttons and hoping. We will start with the easiest and most common causes and work toward the less common ones.
The Battery: The Most Common Cause
Most remotes run on a small coin cell or a small flat battery. They can last for a long time, and then fail suddenly, or they weaken gradually so the range shrinks before the remote quits. If you have noticed that you now need to be close to the door for it to respond, a tired battery is the likely reason.
Replacing it is a simple job that needs no tools beyond, sometimes, a small screwdriver or a coin to pry the case open. Check the number printed on the old battery and buy the same type. Note which way the plus side faces before you remove it.
- Open the remote case gently, using the slot or the small screw.
- Take note of the battery's orientation, with the flat plus side up or down.
- Remove the old battery and fit the new one in the same direction.
- Close the case fully so the contacts press firmly.
- Test the remote while standing close to the door.
Signs the battery is the problem
A small light on the remote that is dim or does not light when you press the button points to power. A remote that works only when held right next to the opener, or only on a second or third press, also points to a weak battery.
Check the contacts too
Look for green or white crust on the metal contacts. Humid coastal air can corrode them. If you see any, wipe gently with a dry cotton swab, and make sure the battery sits tightly against them.
Range, Distance and Line of Sight
A remote that used to reach the door from the end of the street and now needs you in the driveway may not be broken at all. Range changes with battery strength, the position of the antenna, and what sits between you and the opener.
Try the remote from a few different spots. If it works close to the door and fails farther away, the signal is weak. That can come from the remote's battery, or from a problem at the opener's receiver.
Metal reflects and absorbs radio signals. A closed metal garage door, a car with a metal roof parked in front, and a metal storage shelf can all reduce the range. Holding the remote high and pointing it at the opener can help while you test.
The Opener Antenna
On the back or side of the opener motor unit you may find a thin wire hanging down. That wire is the antenna, and it helps the receiver pick up signals from your remote. If it has been bent, tucked behind a bracket, cut, or pulled off during storage work, the opener can lose most of its range.
Look at it from the floor. It should hang straight and unobstructed. Do not use a ladder to reach into the opener housing, and do not try to repair a cut antenna wire yourself, because the opener contains mains power and you should not open it.
What a technician checks
A technician can look at the antenna and receiver together, test signal strength and tell you whether the opener's receiver is the weak link. That check belongs with our remote and keypad programming service.
Reprogramming the Remote
Sometimes the remote has a good battery and the opener has power, yet nothing happens. That can mean the opener has forgotten the remote's code. It can happen after a power surge, an opener reset, a memory wipe done on purpose, or a replacement of the opener's logic board.
Most openers have a learn button on the motor unit, which pairs a remote with the opener. The exact steps differ by brand and by age, so the owner's manual or the label on the unit is the right guide. Generally you press the learn button, then press the remote button within a few seconds.
- Check the learn button color or label on the opener, which varies by model.
- Follow the pairing steps in your opener's manual.
- Pair one remote at a time and test it before moving on.
- If the opener will not accept new remotes, its memory may be full or it may need service.
- Stop if you need to use a ladder in a cramped or unsafe spot.
Why you should not use a stool in a hurry
The learn button is usually on the ceiling-mounted unit. Use a stable step ladder, keep the door still, and do not reach near the door hardware. If you are unsure, let us do this part for you.
Radio Interference and Strange Behavior
Garage door remotes share the radio spectrum with many other devices. Interference is less common than a weak battery, but it does happen, and it can cause confusing symptoms such as a remote that works in the morning and fails in the evening.
Common sources include LED bulbs with poorly shielded drivers, nearby power equipment, new wireless security gear, and neighbors' equipment. Some LED bulbs placed in the opener's light sockets are known to interfere with the receiver. If the trouble began after changing the bulbs, try swapping them back as a test.
Try a change of place
If the remote fails at one point on your street but works at another, interference is a good suspect. It is a clue worth sharing when you describe the problem.
When the door acts on its own
A door that opens or closes without being asked is a different matter and a safety concern. See our page on a door that opens or closes by itself.
Visor and Car Remotes
Many vehicles have a built-in garage door button on the visor or mirror, and it needs to be paired with the opener separately. If your car button stopped working but the handheld remote still does, the car's memory may have been cleared, often after a battery change or a service visit.
Car units follow their own pairing steps, which are in the vehicle's owner's manual. Some also need the opener's learn button pressed during the process. If the handheld remote works fine, the opener is healthy and the issue lies with the car's transmitter.
Remote Types and Why They Matter
Remotes come in several forms, and compatibility affects what you can replace. Older remotes use a row of small switches inside, while newer ones use rolling codes that change every time you press the button. A rolling code remote must be paired with the opener's learn function.
A replacement that does not match the opener's frequency or code type will never work. The table below shows the usual categories and what they tell you.
| Remote type | How it pairs | First thing to check |
|---|---|---|
| Older switch type | Matching small switches in remote and opener | Whether the switch pattern still matches |
| Rolling code handheld | Learn button on the opener | Battery, then pairing |
| Visor or car button | Vehicle menu plus opener learn button | Whether the handheld still works |
| Phone app or smart hub | App setup through the opener or a hub | Wi-Fi connection and account login |
| Keypad | Code entered on a wall panel | See the keypad page for its own checks |
When It Is Not the Remote at All
If a fresh battery, a closer distance and a pairing attempt change nothing, step back and consider the opener. A faulty receiver board, a worn logic board, or a power problem can all stop remotes from working.
Check that the opener has power. Is the light on the unit coming on? Are other devices on the same outlet working? A tripped outlet or a loose plug can look just like a dead remote. Also look at the sensors near the floor, since blinking or dark sensor lights can stop the door from closing.
Opener power and lights
Read about what the opener indicator lights mean if the unit is flashing or showing codes.
Opener age
Older openers can lose receiver sensitivity over time. When a model is very old, the better fix may be a new opener rather than a new receiver. We will talk through the options if that applies.
A Sensible Order for Your Own Checks
It is easy to jump around when a remote fails, and that makes it hard to tell which step fixed the problem. Working in a set order keeps things simple and gives you useful information to share if you do need help.
Treat each check as a question with a yes or no answer, and write the answers down as you go. By the end you will know whether the cause is the remote, the pairing, the signal or the opener.
- Does the wall button work? If not, the problem is not the remote.
- Does the remote light come on when pressed? If not, replace the battery.
- Does the remote work right next to the opener? If so, the issue is range.
- Is the antenna wire hanging straight and undamaged?
- Did anything change recently, such as new bulbs or a power outage?
- Does a second remote behave the same way as the first?
Why a second remote is a useful test
If a spare remote works and the main one does not, the main remote is the culprit. If both fail in the same way, the fault is more likely at the opener, in its receiver or its memory.
Stop points
Stop and contact us if the opener will not respond to anything, if it behaves strangely, if the door is crooked, or if you would need to reach near the springs or cables to continue.
Safety Notes for Remote Checks
Everything in this page can be done without touching springs, cables or brackets. Keep it that way. Remote problems rarely involve the dangerous parts of the door, and there is no reason to go near them.
If the door is open or partly open while you test, stay out from under it. Test the remote from the driveway, in view of the door, with children and pets kept back. If something about the door looks wrong, such as a crooked panel or a loose cable, stop and read our page on a cable that snapped or came off the drum instead.
How We Help With Remotes
A technician will test the remote's signal, the opener's receiver and the antenna, and explain which part is the problem. If the opener is healthy, we can program new remotes or a keypad and make sure each one works from where you actually use it.
If the opener is the limiting factor, we explain the repair or replacement options. Our opener repair service covers receiver and logic board issues, and the guide to programming remotes and keypads explains the process in general terms.
Keeping Remotes Working Longer
Remotes last longer when they are treated gently. Avoid leaving them on a hot dashboard, where heat shortens battery life and can damage the case. Keep a spare battery in the glove box or kitchen drawer so you are not stuck outside the garage.
In humid weather, keep remotes away from damp surfaces and wipe off moisture. If you have several remotes, label the batteries or note the change date, so you replace them before they fade. A regular visit to check the opener's receiver and sensors helps catch a weakening signal early.
Questions and answers
Short range is a classic sign of a weak battery, though it can also point to a bent opener antenna, a metal object blocking the signal, or interference from new bulbs or devices nearby. Start by replacing the battery. If range is still poor, check the antenna wire on the opener and tell us what you found when you get in touch.
Check that the battery is the right type and facing the correct way, and that the contacts are clean. Then try the wall button to confirm the opener works. If it does, the remote may need to be paired again with the opener. If neither works, the opener may need service and we can take a look at the unit, the wiring and the power supply.
Often yes. Most openers have a learn button on the motor unit, and the steps are in the owner's manual. Use a stable ladder and keep clear of the door while you do it. If the opener will not accept the remote, or you would prefer not to climb up, we can handle the programming for you on a visit.
It is possible. Some LED bulbs create radio noise that interferes with the opener's receiver, which shortens remote range. If the trouble began after you changed the bulbs, try putting the old type back for a test. Bulbs made for garage door openers are designed to avoid this problem. Tell us if you suspect this and we will check it when we look at the opener.
The vehicle's built-in transmitter stores its own code, and it can be cleared after a battery disconnect or a service visit. Because the handheld remote still works, the opener is fine. You will likely need to pair the car button again using the steps in the vehicle manual, sometimes with the opener's learn button.
Usually it is not. A sudden stop most often comes from a dead battery or a lost pairing after a power surge. Sometimes the opener's receiver has failed. If the wall button and the door still work normally, the remote is the likelier cause, and the checks above will help you narrow it down before you call us.
Tell us whether the wall button works, whether you changed the battery, how far the remote reaches, and what opener and remote you have if you know them. Mention anything that changed before the trouble started, such as new light bulbs, a power outage or a storm. Those details help us arrive ready and prepared for your situation.