
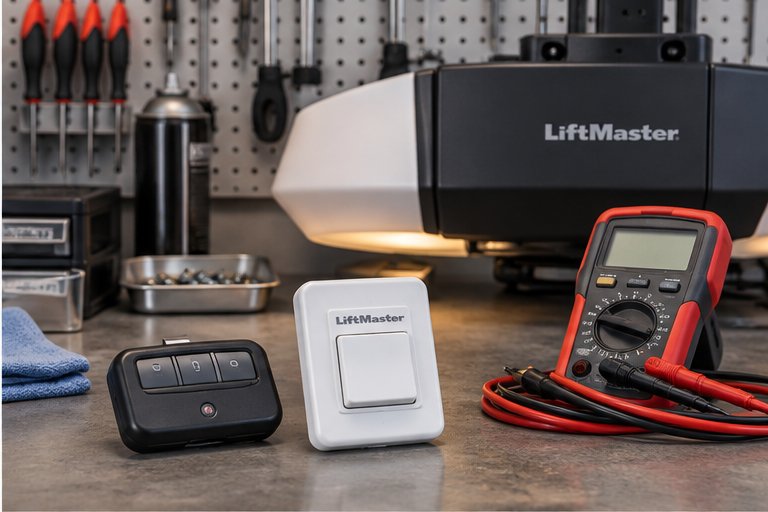
Why openers use lights to communicate
A garage door opener has no screen and no voice. When it needs to tell you something, it has a handful of small lights and sometimes a few beeps. Those signals are compact on purpose: one light can mean the system is ready, a different pattern can mean a sensor is blocked, and a third can mean the opener has stored a fault.
That compactness is also the source of the confusion. A single blinking light can mean very different things on different models, and a pattern that is harmless on one opener can point to a real fault on another. Manufacturers do not use a shared code, so there is no universal chart that applies to every brand.
What does exist is a set of common ideas. Steady usually means normal. Blinking usually means something needs attention. A count of blinks followed by a pause usually points to a particular fault. This guide explains those ideas so that you can read a signal in context, and then points you to the one reliable source for your exact model: its manual.
Where the lights are and what each one watches
Most systems have lights in three places. Each one looks after a different part of the system, and knowing which one is blinking is the first step in reading the signal.
The motor unit on the ceiling usually has a status light, a learn or program light, or both, often behind a small cover or near the learn button. The wall control often has a small light that shows the state of the lock feature or the connection to the opener. The photo eye sensors near the floor have one light each that shows whether the beam between them is intact.
The motor unit
The unit on the ceiling is the brain of the system. It holds the receiver for the remotes, the circuit board that controls the motor and, on many models, a diagnostic display or a set of LEDs. A light here may be telling you about the safety circuit, the memory of paired remotes or a stored fault code.
The wall control
A wall control is wired to the opener. Its light may glow steadily, blink slowly when the lock mode is on, or turn off when the opener loses power. Some controls have a separate light for the motor lights or a vacation feature.
The safety sensors
The two sensors on either side of the door each show a light. One sends an invisible beam, the other receives it. When the beam is intact, both lights are typically steady. When it is broken or misaligned, one or both lights usually blink or go dark.
The basic vocabulary: steady, slow blink, rapid blink, flash and count
A few words describe nearly every pattern. Using them the same way each time makes it easier to find the answer in a manual and to describe the signal to someone else.
Steady means the light stays on without changing. Blinking means it turns on and off at an even rhythm. A flash is usually a brief burst of light, such as when you press a button or when a remote is learned. A count is a series of blinks, followed by a pause, then repeated. A count of three, for example, means three blinks and a pause, not three seconds of anything.
Whether a blink is described as slow or rapid also matters, and the same count can have different meanings at different speeds. When you read a signal, count carefully, note the rhythm, and write down what you saw before you look anything up.
- Steady: a constant glow, often meaning ready or connected.
- Slow blink: an even, relaxed rhythm, often a status or lock indication.
- Rapid blink: a faster rhythm, often a warning about a sensor or a fault.
- Flash: a short burst, often a response to a button press.
- Counted blinks: a number of blinks, a pause, then a repeat, usually a fault code.
- Dark: no light at all, which can mean no power or a failed component.
What a steady light usually means
A steady light on a sensor usually means the beam is intact and the sensor is happy. A steady light on the motor unit usually means the opener is powered and ready. A steady light on the wall control, if your model has one, often shows that the control is connected or that the unit is powered.
It is worth remembering that a steady light does not prove that everything is working. A sensor can have a steady light and still be pointing slightly off, a state that shows up as an occasional reversal. A steady status light does not tell you about the springs, cables or tracks, which the opener cannot see.
If you have never paid attention to your lights, take a moment to look at them now, while everything is working. Knowing what normal looks like is the right preparation for noticing when it changes.
What a blinking sensor light generally means
A blinking or dark light on one or both photo eyes is the most common signal homeowners see. In general terms, it means the sensor does not detect the beam from its partner. The cause is usually simple: something is in the way, a lens is dirty, or a sensor has been nudged out of alignment.
The sending sensor and the receiving sensor often show different lights, or the same light with different behaviors. One light may be off while the other is steady, or one may blink while the other glows. The manual for your model explains which is which, and the page on blinking sensor lights covers common causes in more detail.
Safe checks are easy to describe. Clear anything from the path of the beam. Wipe each lens with a soft, dry cloth. Look at the brackets that hold each sensor and see whether one is loose or has swung out of line. A sensor that has shifted a small amount can look fine to the eye and still lose its partner, so a gentle look from the side along the line of the beam sometimes reveals the problem.
What a flashing opener light often means
A flashing light on the motor unit, or flashing work lights on the opener, is a sign that the opener wants your attention. In general terms, it can mean the opener has detected a problem with the safety system, has lost track of the door's position, or has stored a fault.
Some openers flash the work lights when the safety sensors have been interrupted during a close. Others flash when a setting has been lost, such as after a power loss or a reset. Others still use the flashing to show that the opener is in a learn mode, waiting for a remote.
Because the same behavior can have several meanings, the safest reading is this: a flashing light means pay attention, not necessarily that something is broken. Start with the simplest checks, which are the sensors and the path of the door, and then turn to the manual for the specific pattern. For a deeper look at the symptom, see opener light flashing.
Counted blinks and how to read them
Many openers use a counted pattern to show a specific fault. The light blinks a certain number of times, pauses, and repeats. The count points to an entry in the manual's diagnostic table. A manual might list one set of blinks for a sensor fault, another for a motor fault and another for a travel problem.
Reading a count is a matter of patience. Watch the light for at least two full cycles and count the blinks each time. Make sure you are counting the same cycle, since the pause between cycles can be short. If you get a different number the second time, count again until two cycles match.
Write the count down along with the date and anything that happened just before it appeared. Then compare with your manual. If the count points to a sensor, check the sensors. If it points to a motor or a board, that is a stop point, since the next step involves opening the unit or testing parts that need tools and training.
The wall control light and lock mode
A wall control light that blinks slowly is often a sign that lock mode is on. In that state, the opener ignores remotes and keypads, and only the wall control works. Many homeowners trigger lock mode by accident by holding a button too long, and then think the opener has failed.
If your remotes have suddenly stopped working and the wall control light is blinking, check whether lock mode is active. Your manual explains how to turn it off, and the method is usually a press and hold of a specific button. After turning it off, test a remote from the driveway.
A wall control light that is dark when it should be lit is a different matter. It can mean the opener has lost power, the wire between the control and the opener has been damaged, or the control itself has failed. Check the plug and the outlet first, and see the page on wall control and opener light repair if the control does not respond.
Beeps, chirps and clicks
Some openers add sound to the lights. A series of beeps before the door closes is a common safety feature, giving anyone nearby a warning. A chirp from a wall control or a battery backup unit often shows a low battery. A click from the motor unit with no movement can be a relay trying to start the motor.
When a beep and a light come together, treat them as one signal. A battery backup that beeps every so often is telling you its battery is low or has reached the end of its life. A door that beeps and flashes before it moves is showing a built in warning, not a fault.
If you are not sure whether a sound is a normal feature or a warning, note when it happens and what the lights are doing at the same time. That combination is easier to look up and easier to describe.
What the lights cannot tell you
It is easy to expect more from a light than it can deliver. An opener has no way to see a worn spring, a fraying cable, a bent track or a sagging panel. A steady light does not mean the door is healthy, and a blinking light does not always mean the opener is at fault.
Many problems that look like opener faults are really door problems. A door that is hard to lift, out of balance or binding in the track forces the opener to work harder, and the opener may react by stopping, reversing or showing a fault. A technician will usually check the door first, since fixing the opener without fixing the door only masks the cause.
If the lights suggest one thing and the door suggests another, trust what the door is doing. A door that is heavy, crooked or noisy should be treated as a mechanical problem first, whatever the lights say.
A general guide to common signals
The table below shows general ideas only. Your opener may differ, and the manual for your model always takes priority. Use it as a way to organize your thinking, not as a decoder.
| Signal | General reading | Safe first step |
|---|---|---|
| Both sensor lights steady | Beam intact | None needed |
| One sensor light dark or blinking | Beam blocked or sensors misaligned | Clear the path, wipe lenses, check the brackets |
| Both sensor lights dark | No power to sensors or a wiring fault | Check the opener power and the sensor wires you can see |
| Motor unit lights flash after a close attempt | Safety system or sensor trouble | Check the sensors, then the manual |
| Wall control light blinks slowly | Lock mode may be on | Check the manual for how to turn it off |
| Learn light on or blinking | Opener is in a pairing state | Wait for it to time out or follow the manual |
| Counted blinks and a pause | A stored fault code | Count carefully and compare to the manual |
| Chirp from a battery backup | Low battery or end of life | Check the unit's indicator and the manual |
| No light anywhere | No power or a failed component | Check the plug, outlet and breaker once |
Finding the manual when you do not have it
Many households do not keep the opener manual. If you are looking at a blinking light and have no idea what it means, the first step is to find the model number. It is usually printed on a label on the motor unit, which you can read from a ladder or with a phone camera if you can reach it safely. Do not open the unit.
With the model number, the manufacturer's website often has a downloadable manual, and a short search of the number with the word manual will often turn it up. Many manuals have a diagnostic chart near the back that lists the light patterns and their meanings. If you cannot find it, take a clear photo of the label and the lights and keep them ready for a technician.
Once you have the manual, mark the pages for sensors, lock mode, programming and diagnostics, and keep it with your other home paperwork. A little organization now saves a lot of searching later. The guide to reading your garage door label and opener data explains where to find model details and why technicians ask for them.
When to stop and call
Some signals call for professional attention. A fault code that returns after you have checked the sensors, a motor unit that clicks but does not run, a burning smell, a door that moves differently than before or an opener that behaves erratically are all reasons to stop.
The same goes for anything that points to the door itself. A heavy door, a loud bang, a visible gap in a spring or a cable that has moved all point away from the opener and toward parts that carry dangerous tension. Do not try to adjust them, and do not run the opener to see what happens.
When you contact us, tell us the model if you know it, the pattern of lights as you read it, and what you have already checked. We will explain what we find and what the options are. If the opener needs attention, the page on garage door opener repair describes what that typically involves.
Questions and answers
A blinking light is the opener asking for attention. The most common reason is a problem with the safety sensors, such as a blocked beam or a sensor out of alignment. It can also be a stored fault, a low battery in a backup unit or lock mode. Check the sensors first, then look up the pattern in your manual.
No. Manufacturers use their own patterns, and the same number of blinks can mean different things on different models. That is why there is no single chart that works for every opener. Use general ideas to guide your checks, and use your own manual to read an exact code. The model number on the unit helps you find it.
It usually means the sensors are not receiving power or the wire to them has been interrupted. Check that the opener has power and look along the visible wire for damage or a loose connection. Do not cut or splice wires yourself. If the lights stay dark after the simple checks, a technician can trace the fault.
A slow blink on the wall control often means lock mode is on, which makes the opener ignore remotes and keypads while the wall control still works. Look in your manual for how to turn the lock off, which is usually a press and hold of a button. After that, test a remote from the driveway. Keep notes of what you see so the next step is easier.
No. The lights report on the opener, the sensors and the controls. They cannot see a worn spring or a damaged cable. If the door is heavy, crooked or you heard a bang, treat it as a mechanical problem and stop using the opener. Do not try to adjust the springs or cables yourself. Keep notes of what you see so the next step is easier.
A simple power reset, unplugging for a short moment and plugging back in, is generally safe for most homeowners. A full memory erase is different, since it removes every remote and setting. Read the manual first and be ready to reprogram. If the flashing returns after a reset, stop and have the unit looked at. Keep notes of what you see so the next step is easier.
Describe which light it is and where it is, whether it is steady, slow, rapid or counted, and how many blinks you see in each cycle. Add when it started and what happened just before, such as a storm or a power outage. A short phone video of the pattern is also very useful. Keep notes of what you see so the next step is easier.