
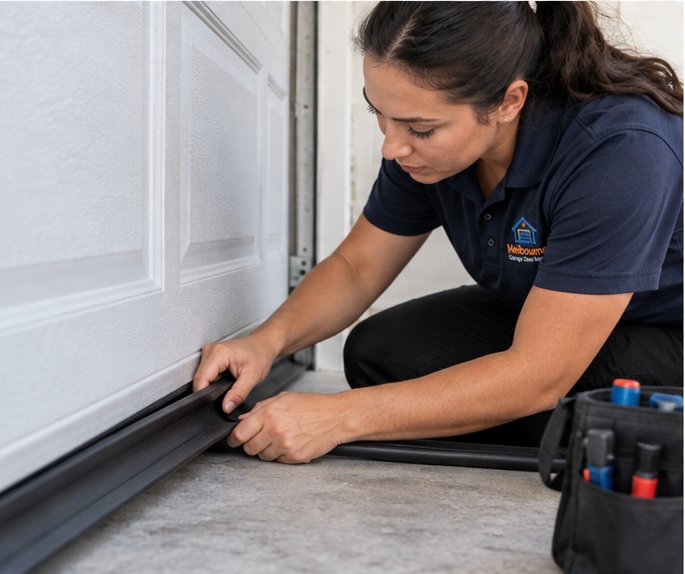
What the bottom seal and threshold actually do
The bottom seal is the flexible strip fastened to the lowest edge of the door. The threshold is the part of the floor, or a strip fastened to it, that the door lands on when it closes. Together they make a barrier between the garage and the outdoors.
On the Space Coast that barrier has plenty to do. Summer storms push rain sideways, afternoon downpours send water running across driveways, and the sandy soil near the coast moves leaves, grit and small debris right up against the door. A seal that is cracked, flattened or pulled loose lets all of it in.
We treat the seal and the threshold as one system. Replacing a worn strip on a door that lands on a sloping slab often only moves the problem, so we look at both before we suggest anything.
Signs that the seal is wearing out
Most homeowners notice the problem first from inside the garage. You see daylight along the bottom edge of a closed door, a damp line on the floor after rain, or a trail of leaves that seems to appear from nowhere.
- A visible gap or a line of light under the closed door
- Rubber that is cracked, brittle, flattened or torn in places
- A seal that has slipped out of its channel at one end
- Water stains or a dark damp patch just inside the door after rain
- Ants, roaches, lizards or other small visitors entering the garage
- Sand and dust collecting along the bottom of the door
Why age matters here
Florida sun is hard on rubber and vinyl. Seals that face the afternoon sun can harden and crack long before the door itself shows any wear, while seals in shade tend to stay flexible longer.
Seal types we work with
There are several common bottom seal styles, and the right one depends on how the bottom of your door is built and what the floor looks like. We explain the options in plain terms rather than pushing one style on every door.
T-style seals
A T-style seal has a flat stem that slides into a channel on the door and two flexible flaps that spread out underneath. Many steel and insulated doors use this style. The two flaps give a little forgiveness on uneven floors.
Bulb seals
A bulb seal has a rounded hollow tube at the bottom that squashes against the floor. It fits a similar channel to the T-style, and some doors use it where the seal needs to compress gently over a larger gap.
Bead or J-style seals
Some doors use a retainer that holds a bead on the end of the seal, and some older doors use a J-shaped profile. Knowing which retainer your door has matters, because the wrong seal will not stay in place.
Threshold seals on the floor
A threshold seal is a rubber or vinyl strip fastened to the slab itself. The door lands on it, and it can make up for dips in the floor that a door seal alone cannot reach.
How we identify the right seal for your door
Before we choose anything we look at the bottom channel. We check whether it is a single or double channel, how wide it is, and whether the bottom panel is straight enough to hold a new seal evenly.
We also look at how the old seal was fastened, whether the retainer is damaged, and whether the bottom panel has rusted or swollen. A seal can only do its job if the metal or wood that holds it is in decent shape.
If the old seal is hard to identify, we compare it with the profile and tell you what we recommend and why. You are welcome to ask questions as we go, since the goal is that you understand what is going onto your door.
Why uneven floors cause so many seal problems
Garage slabs are rarely perfectly flat. Many are poured with a deliberate slope toward the driveway so that water drains out, and over time settling, cracking and soil movement can add dips and humps.
A door that is level can still meet a floor that is not. One corner may touch firmly while the opposite corner leaves a gap, and the seal cannot bridge a gap that is wider than its flexible flaps.
- A sloped slab leaves a larger gap on the low side
- Settling near a corner can leave a dip that is only a few inches wide
- Heaving from tree roots can raise one section of the slab
- A cracked slab may have one edge higher than the other
- A patched or repoured section may sit above or below the original level
What we can do about it
Depending on the size of the gap, we may suggest a seal with a taller flap, a threshold strip fastened to the floor, or a combination of the two. We explain which option suits your slab and why.
Threshold strips and when they make sense
A threshold strip is attached to the garage floor along the line where the door lands. It raises the contact point, gives the bottom seal something firm to press against, and blocks a modest rise of water at the opening.
These strips work well on slabs that dip slightly in the middle or on garages where water likes to flow toward the door. They are less helpful when the floor has a very large gap on one side, because a strip that tall can interfere with the door travel or become a trip hazard.
We think about the way you use the garage too. If you roll a bike, a cart or a trash bin across the opening every day, a tall threshold may be a nuisance, and a lower profile may serve you better.
Things we check before fitting one
We confirm the door still closes fully, the opener still stops where it should, and the strip is fastened firmly enough not to lift when a car or a wheeled item passes over it.
Wind driven rain and storm season
Heavy rain is a normal part of life on the Space Coast. During tropical systems the rain does not simply fall, it drives sideways against the door, and any weak point in the bottom seal becomes a place where water can push in.
A good seal will not stop floodwater, and we would not tell you otherwise. What it can do is keep ordinary wind driven rain and surface runoff from running under the door in normal storms, which protects stored boxes, tools and the floor itself.
If a storm is on its way, a seal that is already worn will not improve when you need it. We encourage homeowners to look at the bottom edge of the door before the season starts. Our guide to garage door hurricane preparation covers the rest of the door.
What a visit for seal and threshold work looks like
A technician comes to the property and begins by looking at the door from outside and inside. We close the door, check for light and gaps along the bottom, and look at how the slab meets the door along its full width.
Next we remove the old seal, clean the channel, and check that the bottom panel is sound. We compare the seal profile with the channel, cut the new seal to the right length and fit it so that it sits evenly across the opening.
After that we run the door through its travel, check that it still reverses properly, and look at the bottom edge again. If a threshold strip makes sense, we explain it before we fit it, and we leave the area tidy.
- Inspect the seal, channel and floor line
- Measure and identify the correct profile
- Remove the old seal and clean the channel
- Fit the new seal and trim the ends
- Test the door travel and the reversal at the floor
- Explain what we did and what to watch for
How a new seal affects the opener
The opener decides where the door stops when it closes, and a new seal changes how much resistance the door meets at the bottom. A thicker or stiffer seal can make the door stop a little higher or trigger the reversal sooner than before.
We check the travel and the close force during the visit and make sure the door still behaves the way it should. If the opener needs a small setting adjustment because of the new seal, we handle it. If the door reverses on the floor, we explain why before we change anything.
You can read more about reversals in our page on a door that reverses before closing. Many reversal calls start with a seal that is too stiff or a floor that is higher than the original.
Common mistakes we see with DIY seal replacement
Replacing a bottom seal is one of the more approachable jobs on a garage door, and some homeowners do it successfully. We are not here to talk you out of it, but a few mistakes show up often enough to be worth knowing.
- Buying a seal by looks rather than by the channel profile, so it falls out
- Cutting the seal too short so a gap opens at one end
- Using sealant or glue in the channel, which makes the next replacement difficult
- Forcing a seal into a bent or rusted channel and tearing it
- Fitting a seal that is too stiff and causing the door to reverse
- Leaving the floor problem untouched so the gap remains
A safety note
Bottom seal work happens near the lowest part of a heavy door. Keep hands and fingers clear of the edge, never lift a door that is stuck partway, and never touch the springs, cables or brackets. If anything about the door looks unusual, stop and call us.
Seals and insulated or older doors
Insulated steel doors usually have a sturdy bottom channel that holds a new seal well. Thin single layer steel doors can be more variable, since the bottom edge may be dented or rusted from years of rain and lawn sprinkler spray.
Older wood doors present a different challenge. The bottom rail may be swollen, split or rotted, and the seal may be nailed or stapled rather than set in a channel. In those cases a new strip may need a new place to live, and we explain the options honestly.
If a bottom panel is badly damaged, a seal will not fix it. Our garage door panel repair page explains when a panel itself should be dealt with first.
Pests, debris and the rest of the weather barrier
A good bottom seal keeps out more than water. It blocks the paths that insects, small lizards and rodents use, and it cuts down on windblown sand, pollen and leaves that build up on the floor.
The seal is only one part of the weather barrier. The side and top edges of the door matter too, and our page on weather seal replacement covers the vinyl stops along the jambs and the header.
When we visit for a bottom seal, we look at the other edges as well. If the stops are cracked or pulled away, a pest or a stream of rain can still find a way around a perfect new seal at the bottom.
Keeping your seal in good shape
A little care helps a seal last. Rinse the bottom edge now and then to remove sand and grit, and wipe it with a mild soap and water if it gets sticky or dirty. Avoid harsh solvents, since some chemicals attack rubber and vinyl.
Once or twice a year, look along the bottom of the closed door. Check for light, gaps, cracks and any section where the seal has slipped out of its channel. A small issue at one end is easier to deal with than a seal that has fallen off.
Our monthly garage door checklist includes a look at the bottom edge alongside the other simple checks you can do safely on your own.
- Rinse sand and grit from the bottom edge
- Wipe with mild soap and water when it looks dirty
- Look for light under the door in the daytime
- Check both ends of the seal for slipping
- Keep sprinkler heads from spraying directly at the door
Choosing between seal service and a bigger repair
Sometimes a worn seal is only a worn seal. Other times it is a sign of something larger, such as a bottom panel that has bent, a door that is hanging crooked, or a track that has shifted. A gap that is wider on one side often points at the door, not the seal.
If the door looks uneven, our page on a gap under the garage door helps you work out what is going on. Water coming in is its own topic, and the guide on water leaking under a garage door goes through it in more detail.
We will tell you if a seal is enough or if the door itself needs attention. You do not need to guess before you call.
| Situation | Usual approach | What to keep in mind |
|---|---|---|
| Cracked or flattened seal on a level slab | Replace the seal with the matching profile | Channel must be clean and sound |
| Small dip in the middle of the slab | Seal with taller flaps or a low threshold strip | Door must still close fully |
| Sloped slab with a gap on one side | Threshold strip plus a flexible seal | Strip height affects foot and wheel traffic |
| Bent bottom panel | Panel repair or replacement first | A new seal will not stay even on a bent edge |
| Rusted or rotted bottom edge | Repair the edge or replace the panel | Seal needs sound material to hold |
Questions and answers
Look at the very bottom of the door. A narrow channel running along the edge that holds a strip with a flat stem usually means a T-style or bulb seal. A bead retainer, a J shape or a nailed strip points to other styles. A technician can identify the profile by its shape and width, and we will explain what we find during the visit.
A seal helps keep out wind driven rain and ordinary runoff, but it is not a flood barrier. In serious flooding, water rises past any seal. We explain what the seal and any threshold strip can reasonably do for your garage, so you know what to expect before a storm. Ask us what to expect for your garage.
Many homeowners can replace a seal safely if the channel is in good shape and they choose the right profile. Stay away from the springs, cables and brackets, keep your hands clear of the door edge, and stop if the door is crooked or hard to move. We are happy to look at the door if you are unsure.
A stiffer or thicker seal adds resistance at the floor, and the opener may read that resistance as an obstruction. The door can also be landing on a floor that is higher than before. We check the travel, the force settings and the seal fit, then explain what is causing the reversal and how to correct it.
A sloped slab is common and is often intended to drain water out of the garage. The gap on the low side may be larger than a seal can reach, so we may suggest a seal with taller flaps or a threshold strip on the floor. We look at your slab and describe the options.
Usually the whole strip is replaced, because the rest of the seal has aged the same way and a patch rarely sits evenly. If the damage is only because a section slipped out of the channel, it may be possible to reseat it. We look at the full length before we recommend one or the other.
A look along the closed door a couple of times a year is a sensible habit, and a check before storm season is wise. Look for light under the door, cracks, flattened rubber and any end that has pulled out of the channel. If you notice damp spots after rain, check sooner. A careful look now and then is plenty to spot trouble early.
The bottom seal and the side and top stops are separate parts. During a seal visit we look at all three edges, and if the jamb stops or header seal are cracked, we explain what we see. Our weather seal page describes that work, so you can ask us about it when you get in touch.