
Why the label is worth finding
A garage door is a made-to-order product more often than people realize. Width, height, panel style, window layout, insulation and finish are all chosen when the door is ordered, and the label is where some of those choices are written down. When you know what the label says, a conversation with a technician becomes much simpler, because you are describing the door by its facts instead of by guesses.
Labels also carry warnings. Safety notices printed on the door, on the spring assembly and on the opener are there because these parts hold stored energy or move with real force. Reading them once, calmly, is a useful habit for anyone who lives in the house, including teenagers who borrow the car and visitors who might press the wall button.
Not every door has a label that survived. Sun, salt air, humidity and years of cleaning can fade or peel a sticker, especially in a coastal climate. This guide also covers what to do when the label is gone, so you are never stuck with nothing to go on.
The places a label is usually found
There is no single required spot, so it helps to know the common ones. Start with the door itself. On a sectional door, look at the inside face of the bottom section near one end, and then at the inside face of the top section. Some makers place the sticker on the edge of a panel, where the vertical stile meets the horizontal rail. A flashlight held at a low angle makes faded print easier to read.
Next look at the spring system above the door, but only with your eyes. A warning tag is often attached to the spring itself or to the bracket at the center of a torsion setup. Stay on the floor, do not touch the spring, and do not lean a ladder against the tracks or brackets. Reading a tag from a few feet away, or from a photograph taken with your phone zoomed in, is plenty.
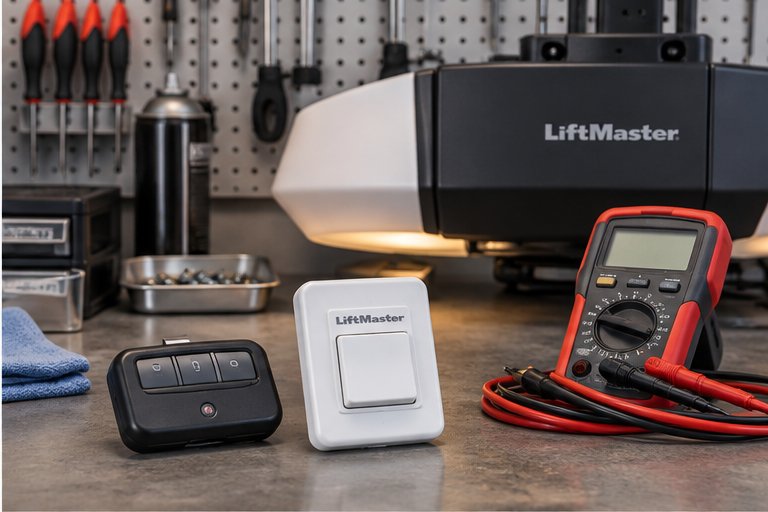
Finally check the opener. The motor head, the side of the housing and the underside near the light lens often carry a rating plate. The remote control and the wall control may also have small labels on the back. Each of these describes a different product, so keep the readings separate.
- Inside face of the bottom section, near either end
- Inside face of the top section, below the hinge line
- Warning tag on the spring or the center bracket (read it from the floor)
- Side or underside of the opener motor head
- Back of the remote control and the wall control
What the typical entries mean
Labels vary between makers, so treat this as a general reading guide rather than a rule. Most door labels identify the manufacturer, a model or series name, a date or batch reference, and the size of the door. Some also list the finish or color, the type of insulation, and a line or two of handling information.
The size entry is usually given as width by height, and it describes the door as built, not the opening it sits in. A small difference between the two is normal, which is why measuring for a new garage door is a separate step.
A date or batch reference tells you roughly how old the door is. That matters when you are weighing a repair against a replacement, because age affects whether matching parts are still easy to source and how the rest of the hardware has likely worn.
| Entry on the label | What it usually tells you | Why a technician cares |
|---|---|---|
| Maker name or logo | Who built the door or opener | Helps narrow down compatible parts and design details |
| Model or series name | The product line | Shows panel style, insulation and hardware family |
| Date or batch reference | Roughly when it was made | Indicates age and likely wear on springs and rollers |
| Width and height | Built size of the door | Starting point for spring selection and fit checks |
| Color or finish note | How the door was painted or coated | Useful when matching a replacement section |
| Warning notices | What not to touch or do | Reminds everyone that springs and cables are not for guessing |
Reading the warning labels the right way
The warning labels on a garage door are short because they are meant to be read at a glance. They usually say that the spring, cables and brackets are under high tension, that only a trained person should adjust them, and that the door can move or fall unexpectedly if the hardware is disturbed. We agree with every word.
A warning label is not a how-to. It does not teach you to adjust anything. Its job is to tell you to stop and call someone who has the right tools and training. If you read a label and it makes you want to reach up and tighten or loosen something, that is the moment to step back instead. Our page on garage door cable safety goes into why those parts deserve distance.
Opener labels carry a different set of warnings. They typically remind users to keep remotes away from children, to test the reversing system regularly, and to avoid walking or standing under a moving door. Those are habits for everyday life, and they pair well with the checks in our guide to garage door safety tests.
What to do when the label is faded or missing
Paint, sun and moisture can erase a label completely. That does not mean the door is a mystery. A technician can often identify the style by looking at the panel profile, the hinge pattern, the roller type, the track size and the spring layout. The door can be measured directly, and the opener can usually be identified by its housing, its learn button and its wiring.
Look through your records for other clues. A purchase receipt, an installation invoice, a builder's closing packet, an HOA approval letter or an old owner's manual may name the model and the date. If the house was bought from someone else, the previous owner may still have a folder worth asking about.
If no records exist, do not worry. Describe what you can see, send photographs, and let the technician fill in the rest on site. We would rather work from a clear photo of a faded door than from a guess at a model name.
Clues you can note yourself
Count the panels, note whether the door has windows, and describe the surface as flat, ribbed or raised. Observe whether the door is one layer of steel or has a thick insulated sandwich. Those simple facts narrow things down more than people expect.
Clues for a technician to handle
Spring size, cable length, drum type and track gauge all require close inspection of parts under tension. Leave the measuring of those pieces to someone trained, and rely on your photographs and notes for everything else.
Reading an opener label
Opener labels do a different job from door labels. They identify the motor unit, describe the electrical supply it expects, and often note the radio frequency or learning method used by its receiver. A technician uses that information to match remotes, keypads and accessories, and to judge whether the unit is a candidate for repair or replacement.
The drive type, whether chain, belt or screw, may not be written on the label, but it is easy to see by looking at the rail. If you want to understand what you have, our guide on garage door opener drive types explains how to tell them apart and what each tends to sound like.
Also note the color and pattern of the learn button on the motor head. Many openers use that button to pair remotes, and its color or label can point to the generation of the unit. Photograph it next to the rating plate so the two can be read together.
Remote and keypad labels
Remotes and keypads usually carry their own tiny labels on the back or inside the battery compartment. These small stickers often name the maker, a model reference and a battery type. If you are replacing a remote, that reference is the quickest way to tell whether a new one will work with your opener.
When you open the battery cover to read the label, do it with the opener idle and note the battery type before removing anything. Replacing a battery is a normal homeowner task, and our guide to programming garage remotes and keypads covers what happens after a new battery or a new remote goes in.
Keep an eye on how many remotes are in circulation. A label tells you what each device is, but only you know who has them. A remote lost from a vehicle is worth treating as a security matter, not just a convenience matter.
Using label information for repair decisions
Once you have the facts, you can start weighing options with better footing. A newer door with an intact label, a known size and a recognizable style is often a good candidate for part-by-part repair. An older door with a faded label and several worn parts may point toward replacement, which our guide on repairing or replacing your garage door discusses in more detail.
Label information also helps with scheduling and preparation. If a section is damaged and needs matching, the finish and panel style from the label can speed up conversations about options. If a spring has failed, the door size and weight help determine what the replacement needs to be, though the final choice always rests with the technician after seeing the door.
We do not promise that a label alone settles a decision. It simply replaces guessing with facts, and that tends to make the visit smoother for everyone.
Keeping a simple garage door record
Consider building a one-page record for the garage. Write down the door size, the panel style, the approximate date of installation, the opener type and any service performed. Add the photos of each label, and note the number of remotes and keypads in use.
The record pays off in several ways. When you sell the house, it helps the next owner understand what they are buying. When something goes wrong, you do not spend the first half hour hunting through drawers. And when an insurance question comes up after a storm, a dated photo of the door and its labels can help document what was there.
A record can be as simple as a note on your phone. The important thing is that it exists and that more than one person in the household knows where it is.
- Door width, height and panel style
- Approximate year of installation or purchase
- Photographs of every label you could read from the floor
- Opener type and the number of remotes and keypads
- Dates and notes from past service or maintenance
Labels in a Florida coastal setting
On the Space Coast, humidity, salt in the air and strong sun are hard on adhesive stickers. A label on a door that faces east or south can bleach out well before the door itself shows its age. Labels on the inside of the garage tend to last longer, since they stay out of the direct sun.
Moisture can also lift the corner of a sticker and let the paper swell. If you see one starting to peel, photograph it now rather than waiting. A faded label is sometimes still readable in a photo taken with a bright, angled light, even when it looks blank to the eye.
For more on how local weather affects the rest of the system, read our guide to garage doors in a coastal climate.
What a label cannot tell you
A label is a snapshot from the factory, not a report on the current condition of the door. It cannot say whether the springs are tired, whether a cable is fraying, whether the tracks have shifted, or whether the opener is working harder than it should. Those answers come only from looking at the door in use.
It also cannot replace measurement. The size on a label is the size of the door as built, and the opening in your wall may differ. It cannot tell you about the balance of the door either, which depends on springs that wear over time. If you want to understand balance, see our explanation of garage door weights and balance.
Treat the label as a good starting point and nothing more. The real information comes from a technician who sees the door, listens to it run and explains what the parts are doing.
When a label points to an older system
Sometimes the label reveals more than you wanted to know. A door made many years ago, an opener from an earlier generation of safety design, or a remote that uses an older radio method can all show up on a label. That is not an emergency, but it is useful information when planning ahead.
Older openers may lack features that newer ones have, such as modern reversing safeguards or battery backup. If you discover that yours is older, our guide to choosing a garage door opener can help you think through the options without any pressure.
In the same way, an older door may be perfectly serviceable with attention to rollers, hinges and seals. The label simply gives you the context to decide with a clear head.
Questions and answers
Most often it sits on the inside face of the bottom or top section, near one end, though some makers place it on a panel edge. Warning tags may also hang on the spring or center bracket. Use a flashlight, stay on the floor, and read spring tags from a distance without touching anything.
Yes, if you only look. Stand on the floor, use a flashlight or a zoomed phone photo, and keep your hands and ladders away from the spring, cables and brackets. Those parts hold dangerous tension, and the tag exists to remind everyone to leave adjustments to a trained technician.
A technician can usually identify the door by its panel profile, hardware and measurements. Check old receipts, builder paperwork or HOA letters for the model, and take clear photographs of the whole door. Describe what you can see and we will work out the rest during the visit.
Not exactly. The size on the label describes the door as built, and the rough opening in your wall may differ slightly. A proper measurement is a separate step, and our measuring guide explains what to note before a replacement is planned.
No. The label is helpful but not required. Many repairs, such as rollers, hinges, sensors and remotes, depend on what the technician sees on site. The label simply makes conversations about parts, age and replacement options clearer when it is available.
The door and the opener are separate products, often made by different companies and installed at different times. The door label describes panels and hardware, while the opener label describes the motor unit. Keep photos of both so each can be matched correctly.
Warning labels are there for everyone who uses the door, so it is better to leave them in place even if they look worn. If one has become unreadable, mention it to a technician, who can talk through what is appropriate for your particular door and opener.