
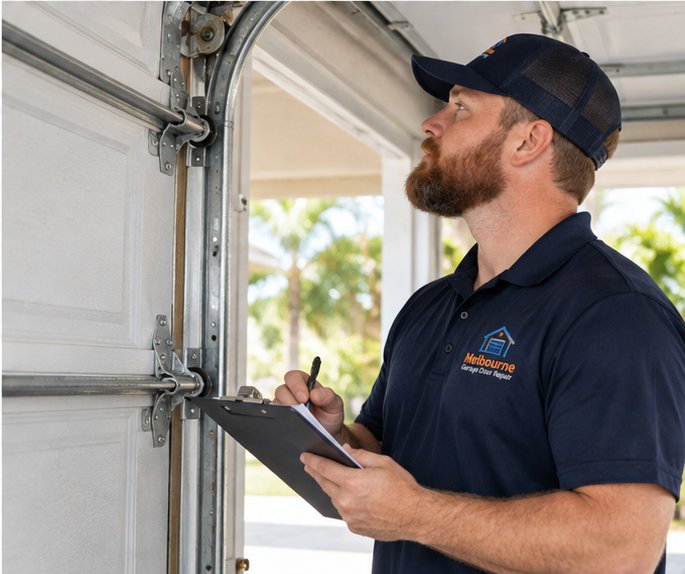
Why a garage door needs lubrication at all
A garage door is one of the largest moving objects in a home, and it moves every time anyone comes or goes. Each trip up and down turns hinges, spins rollers, and drags metal across metal at a dozen points. Without a thin film between those surfaces, friction rises, noise grows, and parts wear faster than they should.
Lubrication does three jobs. It reduces the friction that makes a door groan, it protects bare steel from moisture, and it lets moving parts settle into smooth, even motion so the opener does not have to work as hard. None of that is dramatic, which is why the task is so easy to skip until the door starts squealing.
Lubrication is also one of the few maintenance jobs a homeowner can do safely with a spray can and a rag, provided the work stays away from springs, cables and the brackets that hold them. This guide keeps to that line. Anything under tension is for a trained technician, and we will say so each time it comes up.
Parts that benefit from a light application
Most of the useful lubrication on a sectional door happens at a handful of pivot points. Knowing exactly which ones helps you avoid spraying the whole door, which is both messy and counterproductive.
Hinge pivots
Every hinge has a pin or a folded knuckle where two leaves rotate against each other. These are the spots that squeak most often. A small amount of lubricant on the visible pivot, worked in by opening and closing the door, usually settles the sound.
Roller stems and bearings
Steel rollers have a stem that passes through a hinge or bracket, and many have visible ball bearings. A light application at the point where the stem meets the bracket helps. Nylon rollers with sealed bearings generally need little or no attention, and heavy spraying can attract grit.
Lock and latch mechanisms
If your door has a manual lock bar or a keyed latch, the sliding bar and the keyway can bind over time. A dry-film or graphite-style product is usually kinder to a keyway than an oil, which can gum up.
Opener rail, chain or screw
Chain and screw drive openers carry a moving part that benefits from a light, appropriate coating. The type matters, and we cover it in its own section below.
Parts to leave dry or leave alone
If you are unsure whether a part is safe to lubricate, the answer is to leave it for now and ask. A door that is a little dry is almost always better off than one that has been over-sprayed.
- The inside faces of the vertical and horizontal tracks. Rollers ride on a clean steel surface, and oil there collects dust into a paste that slows the door and can let rollers slip.
- Drive belts. A belt drive should run clean and dry, and lubricant can soften or degrade the belt material.
- Plastic gears and plastic parts inside the opener housing. Solvents and some sprays can damage them, and the housing is not a homeowner service area.
- Door panel surfaces, weather seals and rubber bottom seals, except where a manufacturer allows a specific protectant. Many sprays dry out or swell rubber.
- Springs, cables, drums and the brackets that hold them. These carry stored tension. Leave them to a technician, and read the safety section before reaching anywhere near them.
Product types explained in general terms
Hardware stores sell a confusing wall of cans, and the labels do not always say what is inside. Rather than recommending a brand, it helps to understand the families of product and what each is good at. The table below compares the common ones in everyday language.
A product marked for garage doors is a sensible starting point, because it is usually formulated to stay in place on metal pivots without running or attracting too much dust. Whatever you choose, check the label for the surfaces it is meant for and follow its directions.
| Product type | Good for | Watch out for |
|---|---|---|
| Silicone spray | Light pivots, hinges, some plastic and rubber contact points | Can be thin; may need reapplying sooner on busy doors |
| White lithium style grease | Roller stems, chain, screw rail, heavier pivots | Thick; wipe excess so dust does not stick |
| Light machine oil | Small pins and lock bars in dry indoor spots | Runs and attracts grit; poor choice for tracks |
| Dry film or graphite style | Keyways, latches, lock bars | Powdery residue; keep it away from the door face |
| Heavy penetrating spray | Loosening a seized pin as a one-time measure | Not a lasting lubricant; can thin out and wash away |
Safe setup before you touch anything
Start with the door fully closed. A closed door is at rest, with the springs holding their normal tension in a controlled way. Working on a half-open door, especially one propped up by hand, is how fingers and tools end up where they should not.
Next, take the opener out of the picture. Unplug it from its ceiling outlet, or switch off its circuit, so that nobody can press a wall button or remote while your hands are near a hinge. If the opener is hard-wired and you cannot easily cut its power, treat that as a reason to stop and ask a technician.
Wear safety glasses, because spray bounces. Lay a rag or cardboard on the floor and on the car if it is parked underneath. Keep children and pets out of the garage while you work, and keep your fingers away from the gaps between sections, where a hinge can close on a hand without warning.
Clean first, then lubricate
Lubricant on top of dirt just makes a gritty grease that grinds parts rather than protecting them. Before any product comes out of a can, take a few minutes to wipe the areas you plan to treat. A dry or slightly damp rag is enough for most surfaces.
Wipe the hinge pivots, the visible roller stems, and any lock bar. For the tracks, wipe the inside faces with a rag to remove dust, dried grease and spider webs, but do not lubricate them. A clean track is what lets a roller turn freely rather than skid.
Look as you wipe. A hinge that is cracked, a roller with a flat spot, or a track with a visible dent is telling you something that no amount of lubricant will fix. Make a note of anything you see, because it is useful information when you speak to a technician.
A simple walk-through order
Working in the same order each time makes the job faster to remember and less likely to miss a spot. This is one sensible sequence for a typical two-car sectional door, and it assumes the door is closed and the opener is unplugged.
- Wipe the hinge pivots and roller stems with a clean rag.
- Apply one small drop or one short burst of the chosen product to each hinge pivot, one hinge at a time.
- Apply a small amount where each steel roller stem meets its bracket, again one at a time.
- Treat the lock bar or latch if your door has one, using a product suited to it.
- Wipe away any drips or overspray immediately, especially on the door face and floor.
- Plug the opener back in, then operate the door two or three times from inside the garage to work the product in.
- Listen and look. Note whether the sound has changed and whether any part still looks dry or damaged.
Why one hinge at a time
Treating each point separately keeps the amount small and makes it obvious if one hinge responds differently. A pivot that stays noisy after treatment is often worn rather than dry, and that is useful to know.
How much is enough
Less is almost always better. A single drop or a half-second burst on a pivot is usually all the metal can hold. The rest simply runs down the door, drips onto the floor and picks up dust.
A good test is to wipe the area after you have operated the door a couple of times. If the rag comes away dripping, you used too much. If it comes away with a thin, dark smear, you used about the right amount, because that smear is the film doing its job.
Over-application is more than untidy. Excess lubricant thrown off by a moving roller can reach the door face, the floor and the weather seal, and it collects the fine sand and salt that are always in the air near the coast.
Opener drive parts and how they differ
The opener adds its own moving parts to the maintenance picture. What belongs on them depends on the drive type, and we explain the types in more detail in our guide to garage door opener drive types.
Chain drive
A chain drive is the most common type and the one that benefits from a light coating along the chain. Apply a small amount with the opener unplugged, then run the carriage a few times to spread it. Wipe off any excess so it does not sling onto the ceiling or your car.
Screw drive
A screw drive uses a long threaded rod. Manufacturers often call for a specific type of grease on the rod at intervals, so read the opener manual before choosing a product. Do not substitute thin spray for the grease the maker names.
Belt drive
A belt drive generally needs no lubricant on the belt itself. Keep it clean and let a technician check the tension and the pulleys during a service visit. If a belt is slipping, our page on a chain that jumped or a belt that is slipping explains what to expect.
Salt air, humidity and the Space Coast
Homes along the Indian River Lagoon and the Atlantic side of Brevard and Indian River counties live with salty, humid air for much of the year. That air settles on bare steel inside a garage, and it can start surface rust on pivots and fasteners that would last far longer in a dry climate.
In this environment a thin protective film matters more than it would inland. It does not stop corrosion entirely, but it slows it, and it keeps hinge pins from seizing in place. Homes closer to the water may benefit from checking pivots a little more often than homes farther in.
Heat is the other local factor. Warm garages thin out some lubricants and encourage them to run, so a light touch and a wipe-down matter even more in summer. Our broader guide on garage doors in a coastal climate covers rust and moisture in more depth.
Signs that lubrication will not solve the problem
Lubrication is a maintenance step, not a repair. It helps a healthy door run quietly, but it cannot fix a part that is bent, worn through or out of balance. If you lubricate and the problem stays, that is information worth acting on.
- A loud bang followed by a door that will not lift usually means a spring has failed. Stop using the door and read our page on a spring that snapped with a loud bang.
- A grinding sound that continues after cleaning and lubricating may point to worn rollers or a damaged track, covered in our page on a grinding garage door.
- A door that feels heavy by hand, drifts when released, or rises unevenly is a balance question, not a lubrication one.
- Hinges that are cracked, rollers with flat spots, or frayed cable strands need replacement, not more spray.
- A door that shakes or rattles as it travels may have loose hardware or a worn component, and a technician should look at it.
Common lubrication mistakes
Over the years we hear the same handful of mistakes from homeowners who meant well. Avoiding them saves effort and avoids creating a new problem.
The first is spraying the tracks. It feels logical, because the rollers run in them, but the track surface is meant to stay clean. A coated track attracts dust and can let a roller slide instead of roll, which is hard on the door and the opener.
The second is using a single product for everything. A thick grease belongs on a screw rail but not on a keyway, and a thin oil belongs on neither. Matching the product to the part is the whole skill.
The third is reaching into the spring area because it looks dry. Springs, cables, drums and bracket bolts are not homeowner territory. If they look rusty or dry, make a note and have a technician check them as part of a visit.
How often to lubricate
A sensible rhythm for most homes is to check and lubricate the points described here a couple of times a year, and again if the door starts making noise. Many owners tie it to something they already do, such as the start and end of hurricane season, or a spring and fall clean-out of the garage.
Doors that cycle many times a day, such as a family with several drivers or a small business, will warrant more frequent attention than a door used once a day. Doors close to salt water are in the same category.
Lubrication fits naturally into a wider routine. Our monthly garage door checklist shows how it sits alongside visual checks, balance tests and sensor checks, so that no single task has to carry the whole load.
What a technician adds to the picture
A technician looking at your door during a maintenance visit does more than apply lubricant. They look at how the door moves, listen for the sounds that show wear, and check items that are not safe or practical for a homeowner to handle, including the spring system, cable condition and bracket fasteners.
That wider view is the reason lubrication is better seen as one part of upkeep rather than the whole of it. A door can be beautifully oiled and still be heading for a failed spring or a frayed cable, and only a trained eye on the hardware will tell you.
If you would like the door looked over, our garage door maintenance and tune-up page explains what we examine and adjust. We explain what we find and what the options are, and we leave the decision with you.
A short routine you can keep
If all of this feels like a lot, here is the version to remember. Close the door, cut power to the opener, wipe the pivots, add a drop where a hinge or roller stem needs it, leave the tracks clean, leave the springs alone, wipe up the excess, and run the door through a few cycles.
Then spend a minute simply watching and listening. The door will tell you more than any can label. Smooth, even travel and a quiet close mean the job is done. A pop, a scrape or a lurch means something else is going on, and that is the moment to stop and call for help rather than reaching for another spray.
Keep a note of the date and what you used, even a line on a sticky note inside the cabinet. When a technician visits, that small record makes it easier to tell what has been done and what has not.
Questions and answers
It is better to match the product to the part. Thin sprays suit light pivots, thicker grease suits chain and screw rails, and dry-film products suit keyways. Some household sprays dry out rubber or damage plastic, so read the label first. If you cannot tell whether a spray is suitable, leave the part alone and ask a technician before applying anything.
No. The tracks should be wiped clean and left dry. Rollers need a clean steel surface to roll properly, and lubricant collects dust into a gritty paste that can make rollers slide. Cleaning the track with a rag is helpful. Lubricating the rollers and hinges instead is what keeps the door moving smoothly and quietly. A technician can talk through the options with you.
We advise against it. Springs and the cables, drums and brackets around them hold dangerous stored tension, and working near them can cause serious injury. Lubrication of that area is part of what a trained technician considers during a visit. Stick to hinges, roller stems and locks, and keep your hands clear of the spring system. A technician can talk through the options with you.
A common routine is a couple of times a year, plus whenever the door starts to squeak. Busy doors and doors near salt water benefit from more frequent attention. Tying the job to a regular date, such as the start of hurricane season, makes it easier to remember and keeps the door in steady condition. A technician can talk through the options with you.
A noise that returns or never improves often means a part is worn rather than dry. Hinges can loosen, rollers can develop flat spots, and tracks can bend slightly. Lubricant cannot repair those. If the sound continues after a light application, have a technician look at the hardware so the real cause can be identified. A technician can talk through the options with you.
It is a sensible precaution. If the opener is powered, someone can press a remote or wall button while your hands are near a hinge or roller, and the door may move suddenly. Unplug the unit or switch off its circuit first. If you cannot easily cut power, ask a technician to handle the job. A technician can talk through the options with you.
It raises the value of a thin protective film on pivots and fasteners, because salty humid air encourages surface rust. It does not mean using more product. A small amount, wiped clean of excess, protects most effectively. Homes near the water may want to check pivots a little more often than homes farther inland. A technician can talk through the options with you.