
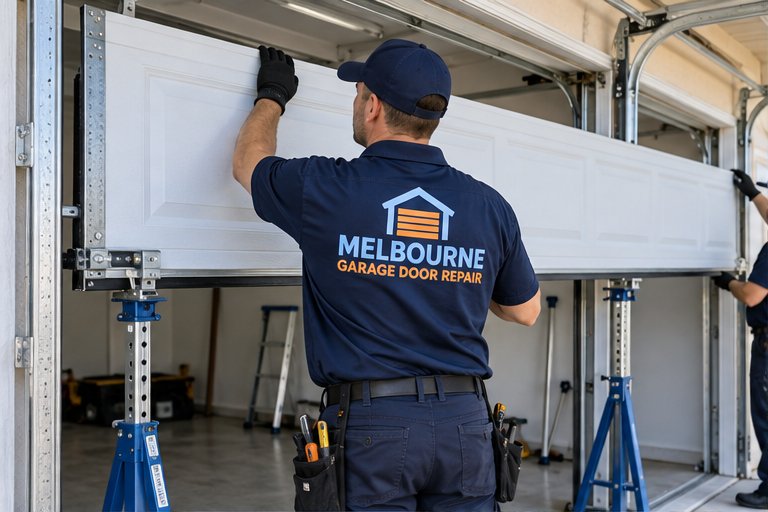
Why the door belongs in the plan early
In a new build, the garage door is often chosen late, after the kitchen, flooring and exterior colors have taken most of the attention. The trouble is that the door depends on dimensions fixed much earlier, when the slab is poured and the walls are framed. A door that does not suit the opening cannot be fixed by a clever installer; it requires changing the building.
Thinking about the door while the plans are still flexible gives you more choices. You can select a style that suits the house, leave room for the track and spring system, and decide on opener type before the ceiling is closed in. Each of those decisions is simple on paper and painful after the drywall is hung.
This guide is general. Your builder, architect and the local building department set the requirements for your lot, and we will not substitute for them. What we can do is explain how a garage door fits into a building so that you ask the right questions.
Opening width and height
The rough opening is the framed hole in the wall that the door will occupy. Sectional doors come in a range of standard sizes, and the opening is normally framed to match the door you choose. Custom sizes exist, but they usually change what products are available and how long an order takes.
Single car, double car and wider openings all behave differently. A wide door carries more weight and needs a stronger header, more careful spring selection and a stiffer panel arrangement. A taller opening, such as one planned for a lifted truck or a van with a roof rack, changes the track layout and the amount of ceiling space needed.
Decide what will actually live in the garage before settling the size. Boats, golf carts, work trailers and tall vehicles are common along the Space Coast, and a door that is a few inches too short or narrow becomes a daily irritation. Our comparison of single and double garage doors discusses the tradeoffs.
Headroom: the space above the opening
Headroom is the clearance between the top of the opening and the ceiling or the lowest obstruction above it. A sectional door needs that room for the curve where the vertical track bends into the horizontal. If there is not enough, the door cannot be installed in the usual way.
Obstructions are the common culprit. Ductwork, plumbing, beams, light fixtures and a living space above the garage can all intrude. A truss, a bonus room floor or an air handler hung near the opening may reduce available space more than the plan suggests.
Low-headroom track systems exist for tight cases, and they change the hardware and the way the door travels. They are workable, but they should be planned rather than discovered at installation. Ask your builder to mark the lowest point above the opening on the framing plan, and share it with us if you want a second opinion.
Side room and back room
Beside the opening, the door needs wall space for the vertical tracks, brackets and, on torsion systems, the spring hardware and cable drums. That side clearance is often overlooked when a garage is designed to hold the widest possible door.
Behind the door, the horizontal tracks run back along the ceiling and need depth. A garage that is shallow, or one with a stair, a water heater or a built-in storage wall near the front, can complicate the track path. The usual rule of thumb is that the garage should be deep enough for the door to sit fully overhead and for the opener to be mounted.
A walk-through with a door professional before framing can catch most of these conflicts. Bring the plan, a section drawing and the intended door model. We can talk through the track layout in general terms, and we will explain what we find if we visit the site.
- Wall space on both sides for tracks and brackets
- Depth for horizontal tracks and the opener rail
- A clear path with no pipes or ducts in the way
- A strong mounting point for the opener and track supports
- Enough room to work safely during installation
Framing, headers and jamb quality
The door is attached to the building through the framing around the opening. The jambs on either side must be straight and solid enough to carry the vertical tracks, and the header above must support both the wall load and the weight of the door hardware.
Wide openings place more load on the header, and in Florida the framing must also resist wind forces. Your builder and engineer decide how the opening is framed to meet the local code, and the door itself must meet the wind requirements that apply to your address. The two must work together.
Straight, plumb jambs make installation smoother, and crooked ones cause trouble later, for example rubbing, binding or a door that does not seal along the sides. Ask your builder to confirm that the jambs are plumb and flat before the door arrives. See garage door wind and building rules for how the performance side is usually handled.
Wind loads, permits and code in Florida
Florida's building code includes requirements for doors in wind-prone areas, and the Space Coast is one of them. A garage door is a large opening, and if it fails in a storm, wind can enter the house and raise pressure on the roof. Because of that, the code treats the garage door as an important part of the building envelope.
The specific rating or product approval required depends on your location and the design of the house, and that is set by the plan reviewer and local building department rather than by a door installer. Your permit documents should state the requirement. We recommend giving the door supplier those documents so the product selected meets the stated rating.
Do not assume a door that looks sturdy is acceptable. Ask for the product approval information and keep it with your permit records. Inspectors may want to see it, and a future buyer or insurer may as well.
Choosing between sectional, rolling and other door types
Most homes use a sectional door that rises along tracks to lie flat under the ceiling. It suits residential garages because it offers many styles, insulation options and sizes. Rolling doors coil around a drum above the opening and are common in commercial and storage settings.
Some owners also consider side-hinged carriage doors, which open outward by hand, and tilt-up doors, which are less common today. Each has its own space needs and its own opener compatibility. The choice affects framing, headroom, and cost, and it should be made before the structure is finished.
For the main residential choices, see sectional versus rolling garage doors. A sectional system relies on springs, cables, rollers and tracks working together, and each of those parts needs its own space around the opening.
Think about future use as well as present use. A garage that holds two cars today may need to hold a boat, a workbench or a third vehicle later. Choosing a door and an opening with a little room to spare is usually easier than changing the structure after the fact. It is also worth asking whether you might add a window pattern, a side door or an exterior keypad later, so the framing and wiring leave room for them.
Insulation and the use of the garage
How you plan to use the garage should shape the door. An attached garage that is just a place to park differs from a workshop, a home gym, a hobby space or a room under living space. The more time people spend in the garage, or the more it shares walls and ceilings with conditioned rooms, the more insulation matters.
Insulated doors can reduce heat transfer, dampen noise and make a panel stiffer. They are not required everywhere, and they add weight, which affects the spring and opener selection. If you plan an insulated door, tell the supplier early so the hardware is matched to the weight.
Our guide on garage door insulation explains the construction types in plain language so you can decide whether your use justifies the upgrade.
Planning for the opener
The opener is installed after the door, but its needs should be considered during framing. It requires power at the ceiling, a solid structural point for the header bracket and rail, and enough clearance between the door and the ceiling for the rail to move.
Ask your electrician to place an outlet in the ceiling near the opener location, and to provide a switch location for the wall control. Consider a second outlet for a battery backup unit or a lighting upgrade, and wiring for exterior keypads or sensors where needed. Running a cable now is easier than fishing it through finished walls.
Opener types differ in sound, speed of operation and mounting. If a bedroom or living space sits above or next to the garage, a quieter drive type may be worth planning for. Our guide to choosing a garage door opener covers the main options.
Safety sensors, wiring and controls
Modern openers rely on photo-eye sensors near the floor on both sides of the opening, and they must be mounted and aligned correctly. That means wall space and a way to run low-voltage wire from each sensor to the opener. In a new build, running that wire before the drywall closes in is straightforward.
Plan the wall control location where it can be reached comfortably, away from the opening itself and high enough that children cannot casually press it. Some owners also add an exterior keypad. Choose its location with the weather and the approach path in mind.
Smart features, such as phone connection and notifications, depend on wireless coverage at the garage. If your router is far from the garage, consider extending coverage during the build. This kind of detail is easy now and annoying later.
Lead times and ordering
Garage doors are usually made to order. The supplier builds panels to your width and height, cuts the color and window arrangement you chose, and ships the door with matching hardware. That process takes time, and we cannot predict it, because it depends on the manufacturer, the product and demand.
In general, custom colors, special sizes, wood or wood-look products and wind-rated systems tend to take longer than stock configurations. Orders placed around busy building periods, or after major storms, can stretch further. The safest approach is to ask the supplier for an expected timeline and to build in a margin.
Confirm the exact dimensions in writing before the order is placed, and keep the confirmation. A door made to the wrong size cannot be used, and returning a made-to-order product is often not an option.
Sequencing the work on a construction schedule
Installation fits into the building schedule after the framing, the exterior finish and the floor are in place, and before final inspections. The garage needs to be clear and level, with power available for tools and testing the opener.
Coordination matters. If the slab is not finished, the door cannot be set to the correct height. If the opener power is missing, the door can be hung but not tested. If the paint is wet, the trim may be marked. A short call among the builder, the electrician and the door installer prevents most of these hiccups.
We prefer to see the opening before the door is ordered. If you contact us, we will explain what we find and what the options are, and we will not promise an installation date. See new garage door installation for how the installation itself is handled.
Coastal exposure and materials
Homes near the Indian River Lagoon and along the barrier islands face salt in the air, high humidity and strong sun. Those conditions affect which door materials and hardware last well. Steel doors need good finishes and attention to edges and fasteners, aluminum resists rust but can dent, and composite products avoid rust but come with their own considerations.
Ask the supplier about hardware finishes as well as the panels. Galvanized or coated springs, tracks and fasteners behave differently in salt air, and the hardware is often what shows trouble first. Our guide to garage doors in a coastal climate explains what to look for.
Even inland lots on the Space Coast deal with humidity, afternoon storms and heat, so these questions apply well beyond the beachside.
HOA and design approvals for new builds
Many new subdivisions come with architectural review requirements, and the garage door is a standard part of that review. Builders sometimes have preapproved packages, which makes the choice easier but also narrower. If you want to depart from the package, ask early.
Keep the product details handy: model name, color, window pattern and hardware finish. If your community has a design guideline, check the permitted styles before you choose. Our article on HOA rules and garage door changes explains what an approval request usually contains.
Do not order until you hold written approval where one is required. It is the surest way to avoid a door that cannot be installed.
If your project is an addition or a garage conversion back to a garage, the same questions apply, with one extra point. The existing slab, the wall framing and the ceiling height are fixed, so measure everything before you fall in love with a door. A short list of measurements, together with photographs of the opening from inside and outside, lets a technician give meaningful advice.
Last, plan for the long run. Garage doors are used thousands of times, and the springs, rollers and opener will need attention over the years. Leaving access around the door, keeping the ceiling area open and noting where the model labels are fixed all make future maintenance easier.
A planning checklist before the walls go up
Pulling the above together, here is a plain list to take to your builder. It is not a substitute for the plans or for the local requirements, but it covers the points most often missed.
- Confirm the opening width and height against the door model chosen
- Mark the lowest obstruction above the opening and check headroom
- Check side room and back room for tracks and the opener
- Confirm the wind rating or product approval that applies to your address
- Decide on insulation based on how the garage will be used
- Place a ceiling outlet and a wall control location for the opener
- Run wiring for sensors, keypads and any backup power
- Ask for the supplier lead time and a written confirmation of dimensions
- Gather HOA submission details before ordering
Questions and answers
It depends on the door and track system, so ask the supplier for the specification of the exact model. Standard sectional doors need clearance above the opening for the track curve, and low-headroom systems exist for tight spaces. Mark the lowest obstruction above the opening before framing is finished. That keeps the structure and the product in agreement from the beginning.
You can, but the opening may already limit your options. Door size, headroom, side room and the wind requirement all depend on the framing. It is safer to choose the door model before framing so the dimensions and the structure agree from the start. Ask for the approval paperwork and keep it with your permit records.
Florida's building code includes wind requirements, and the specific rating depends on your location and the design of the house. Your permit documents and local building department state what applies to your address. Give those documents to the door supplier so the product matches. Pulling that wiring before the walls close costs little compared with fixing it afterward.
Yes. The opener needs a ceiling outlet, a solid mounting point, clearance for the rail and low-voltage wiring for the wall control and sensors. Running these during the build is much easier than adding them after the drywall is finished, and it avoids exposed cables. Build a margin into the schedule, because made-to-order products rarely arrive on a predictable date.
We cannot give a set time, because it depends on the manufacturer, the product, the color and the season. Custom sizes, special finishes and wind-rated systems often take longer than common configurations. Ask the supplier for an expected timeline and confirm dimensions in writing before ordering. A site visit before ordering is the simplest way to catch problems while they are still simple to fix.
Yes. We can visit, look at the opening and the space around it, and explain what we find and what the options are. That visit helps catch headroom, side room or wiring conflicts before a made-to-order door is ordered. Contact us to arrange it. We will explain what we find and what the options are.